DIY Steel Horse Arena
Customer Journey with Dean Gray in Arlington, WA
Dean put his entire building up by himself. It’s 75x125x16 and people say they can’t do it. He found a way…
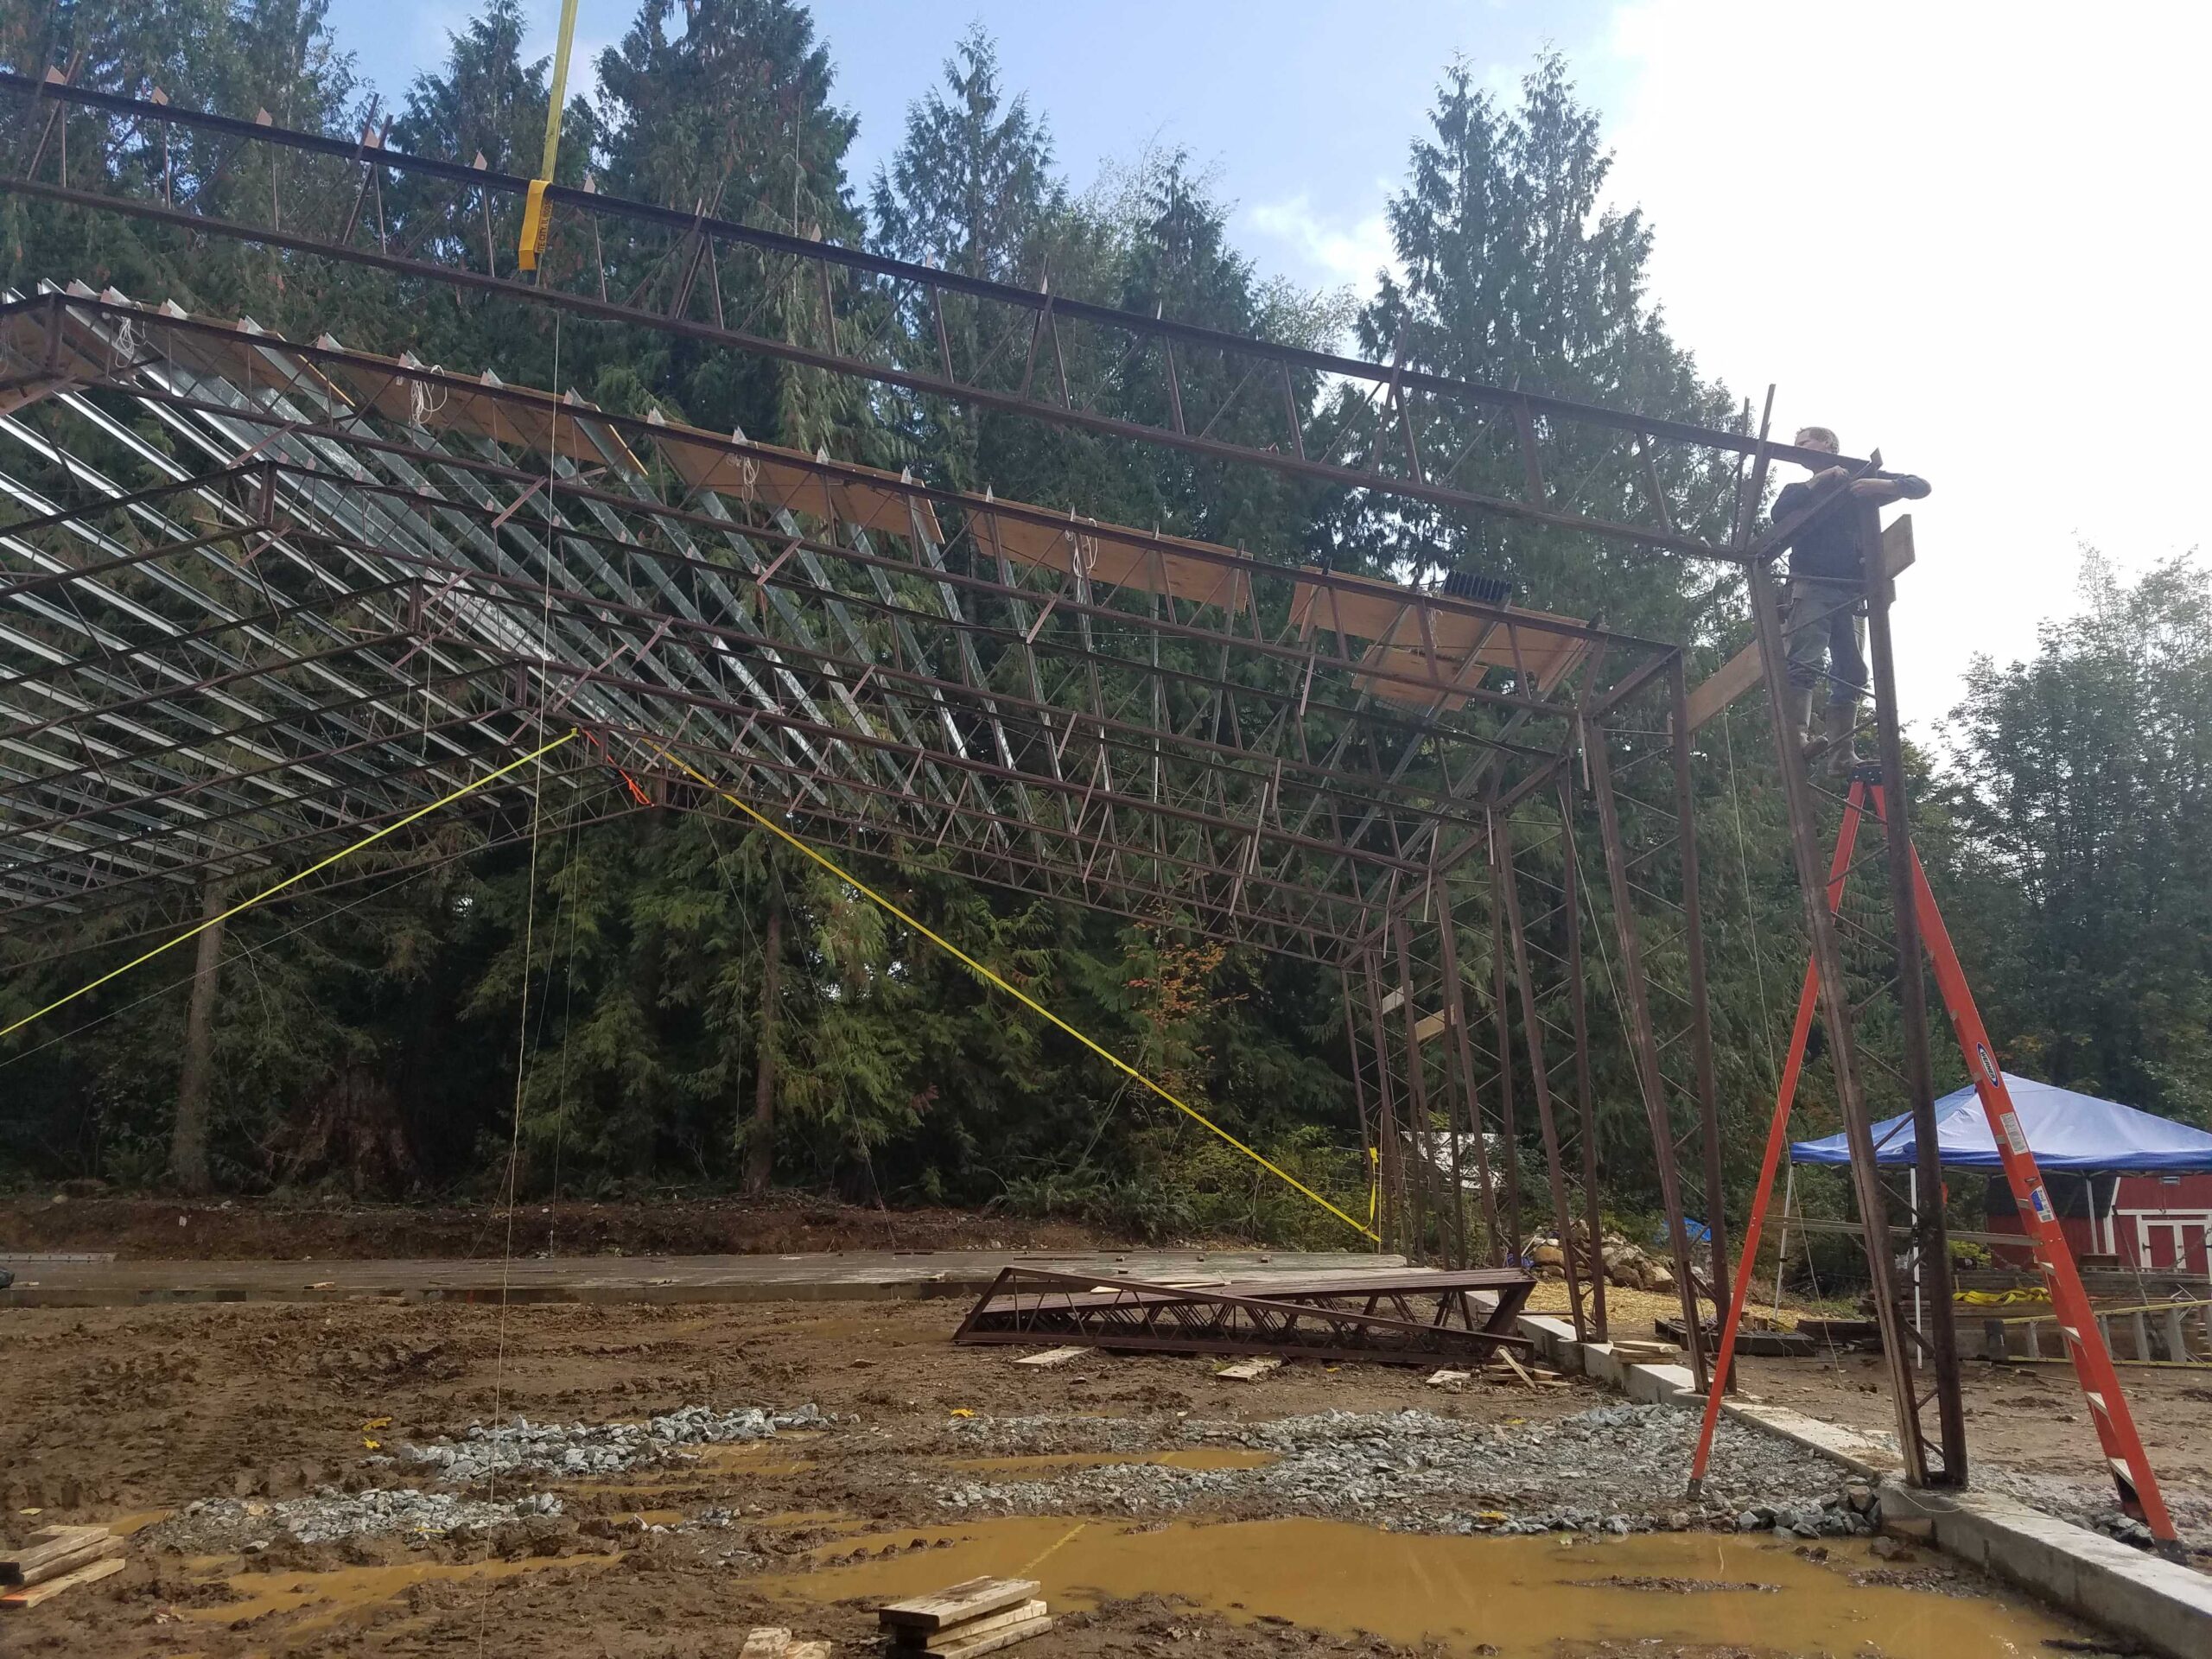
Connecting the Framework
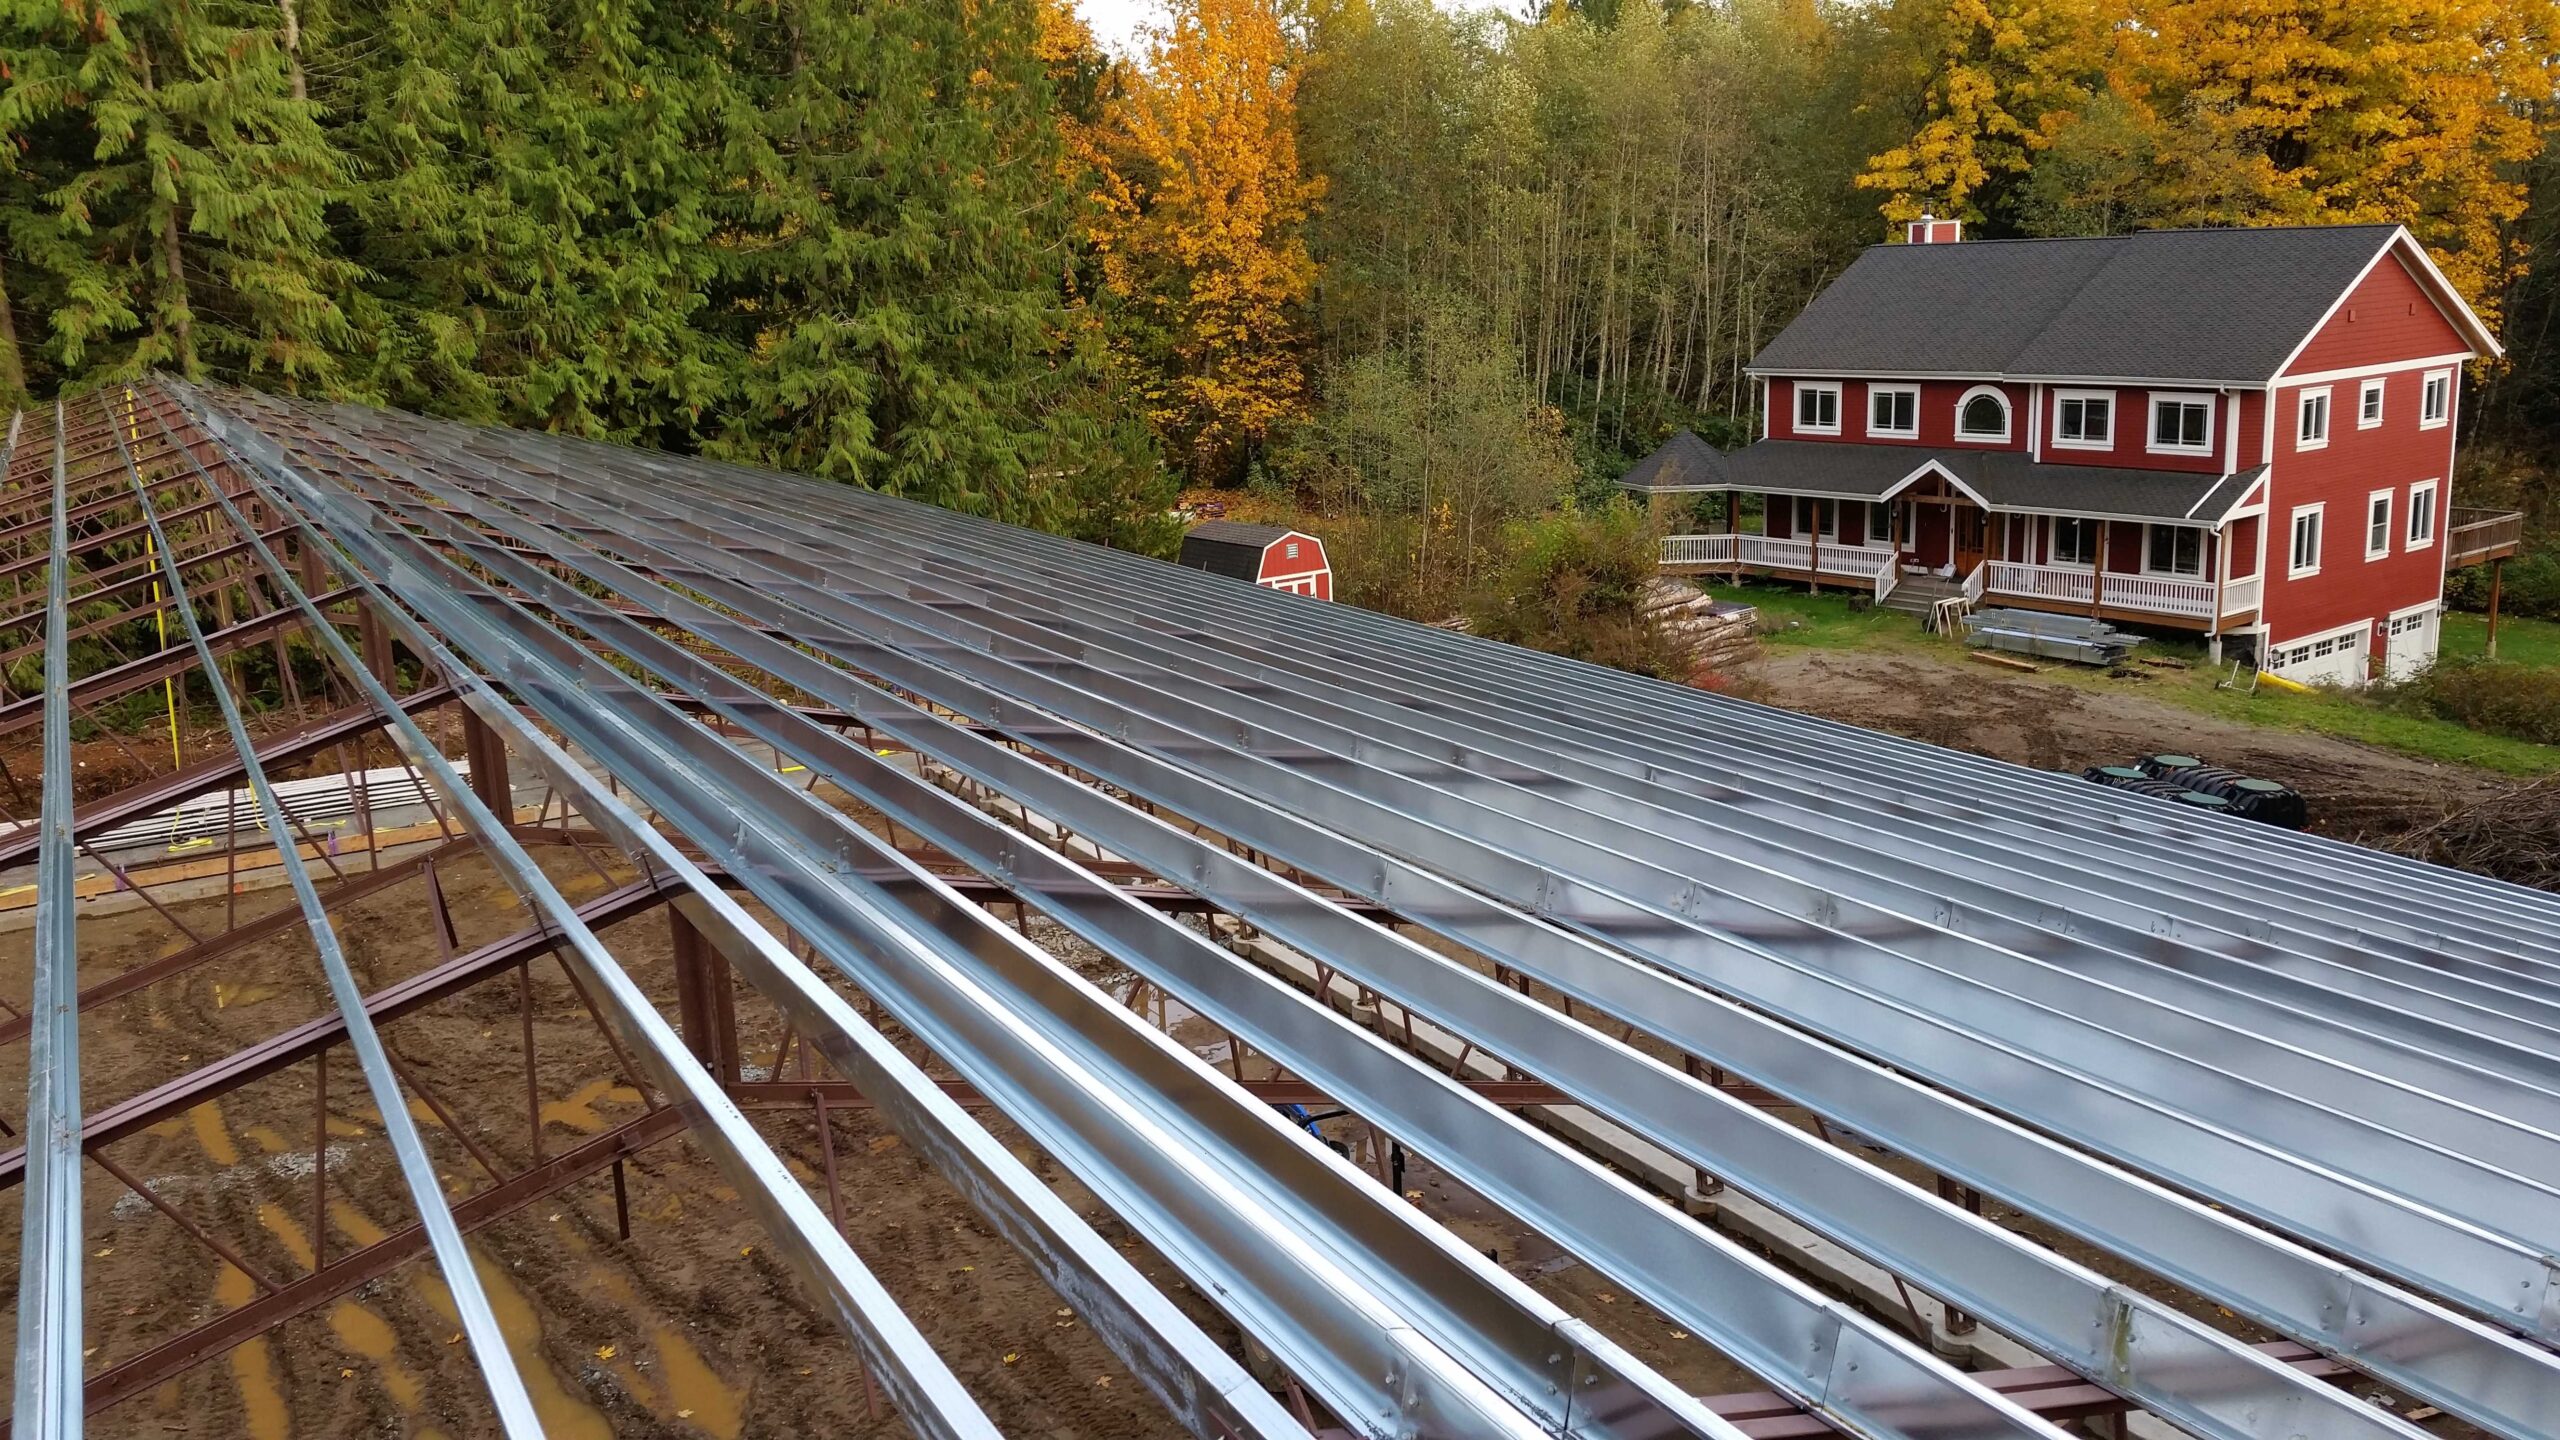
“This shows how I found it most efficient to put up the purlins by myself. You can see I created 4x6ish plywood platforms to walk on for the previous section. There were screwed to 2×4 on the bottom to rest against the purlins to not slide off the roof, but allow me to slide them easily. I tied ropes to each platform so I could pull it over to the next truss after the purlins were installed. I also screwed blocks to the top of the bottom platform to hold the purlins for the next section. These were loaded up there with the telehandler. You can see the purlins sitting up there in this photo.” ~Dean
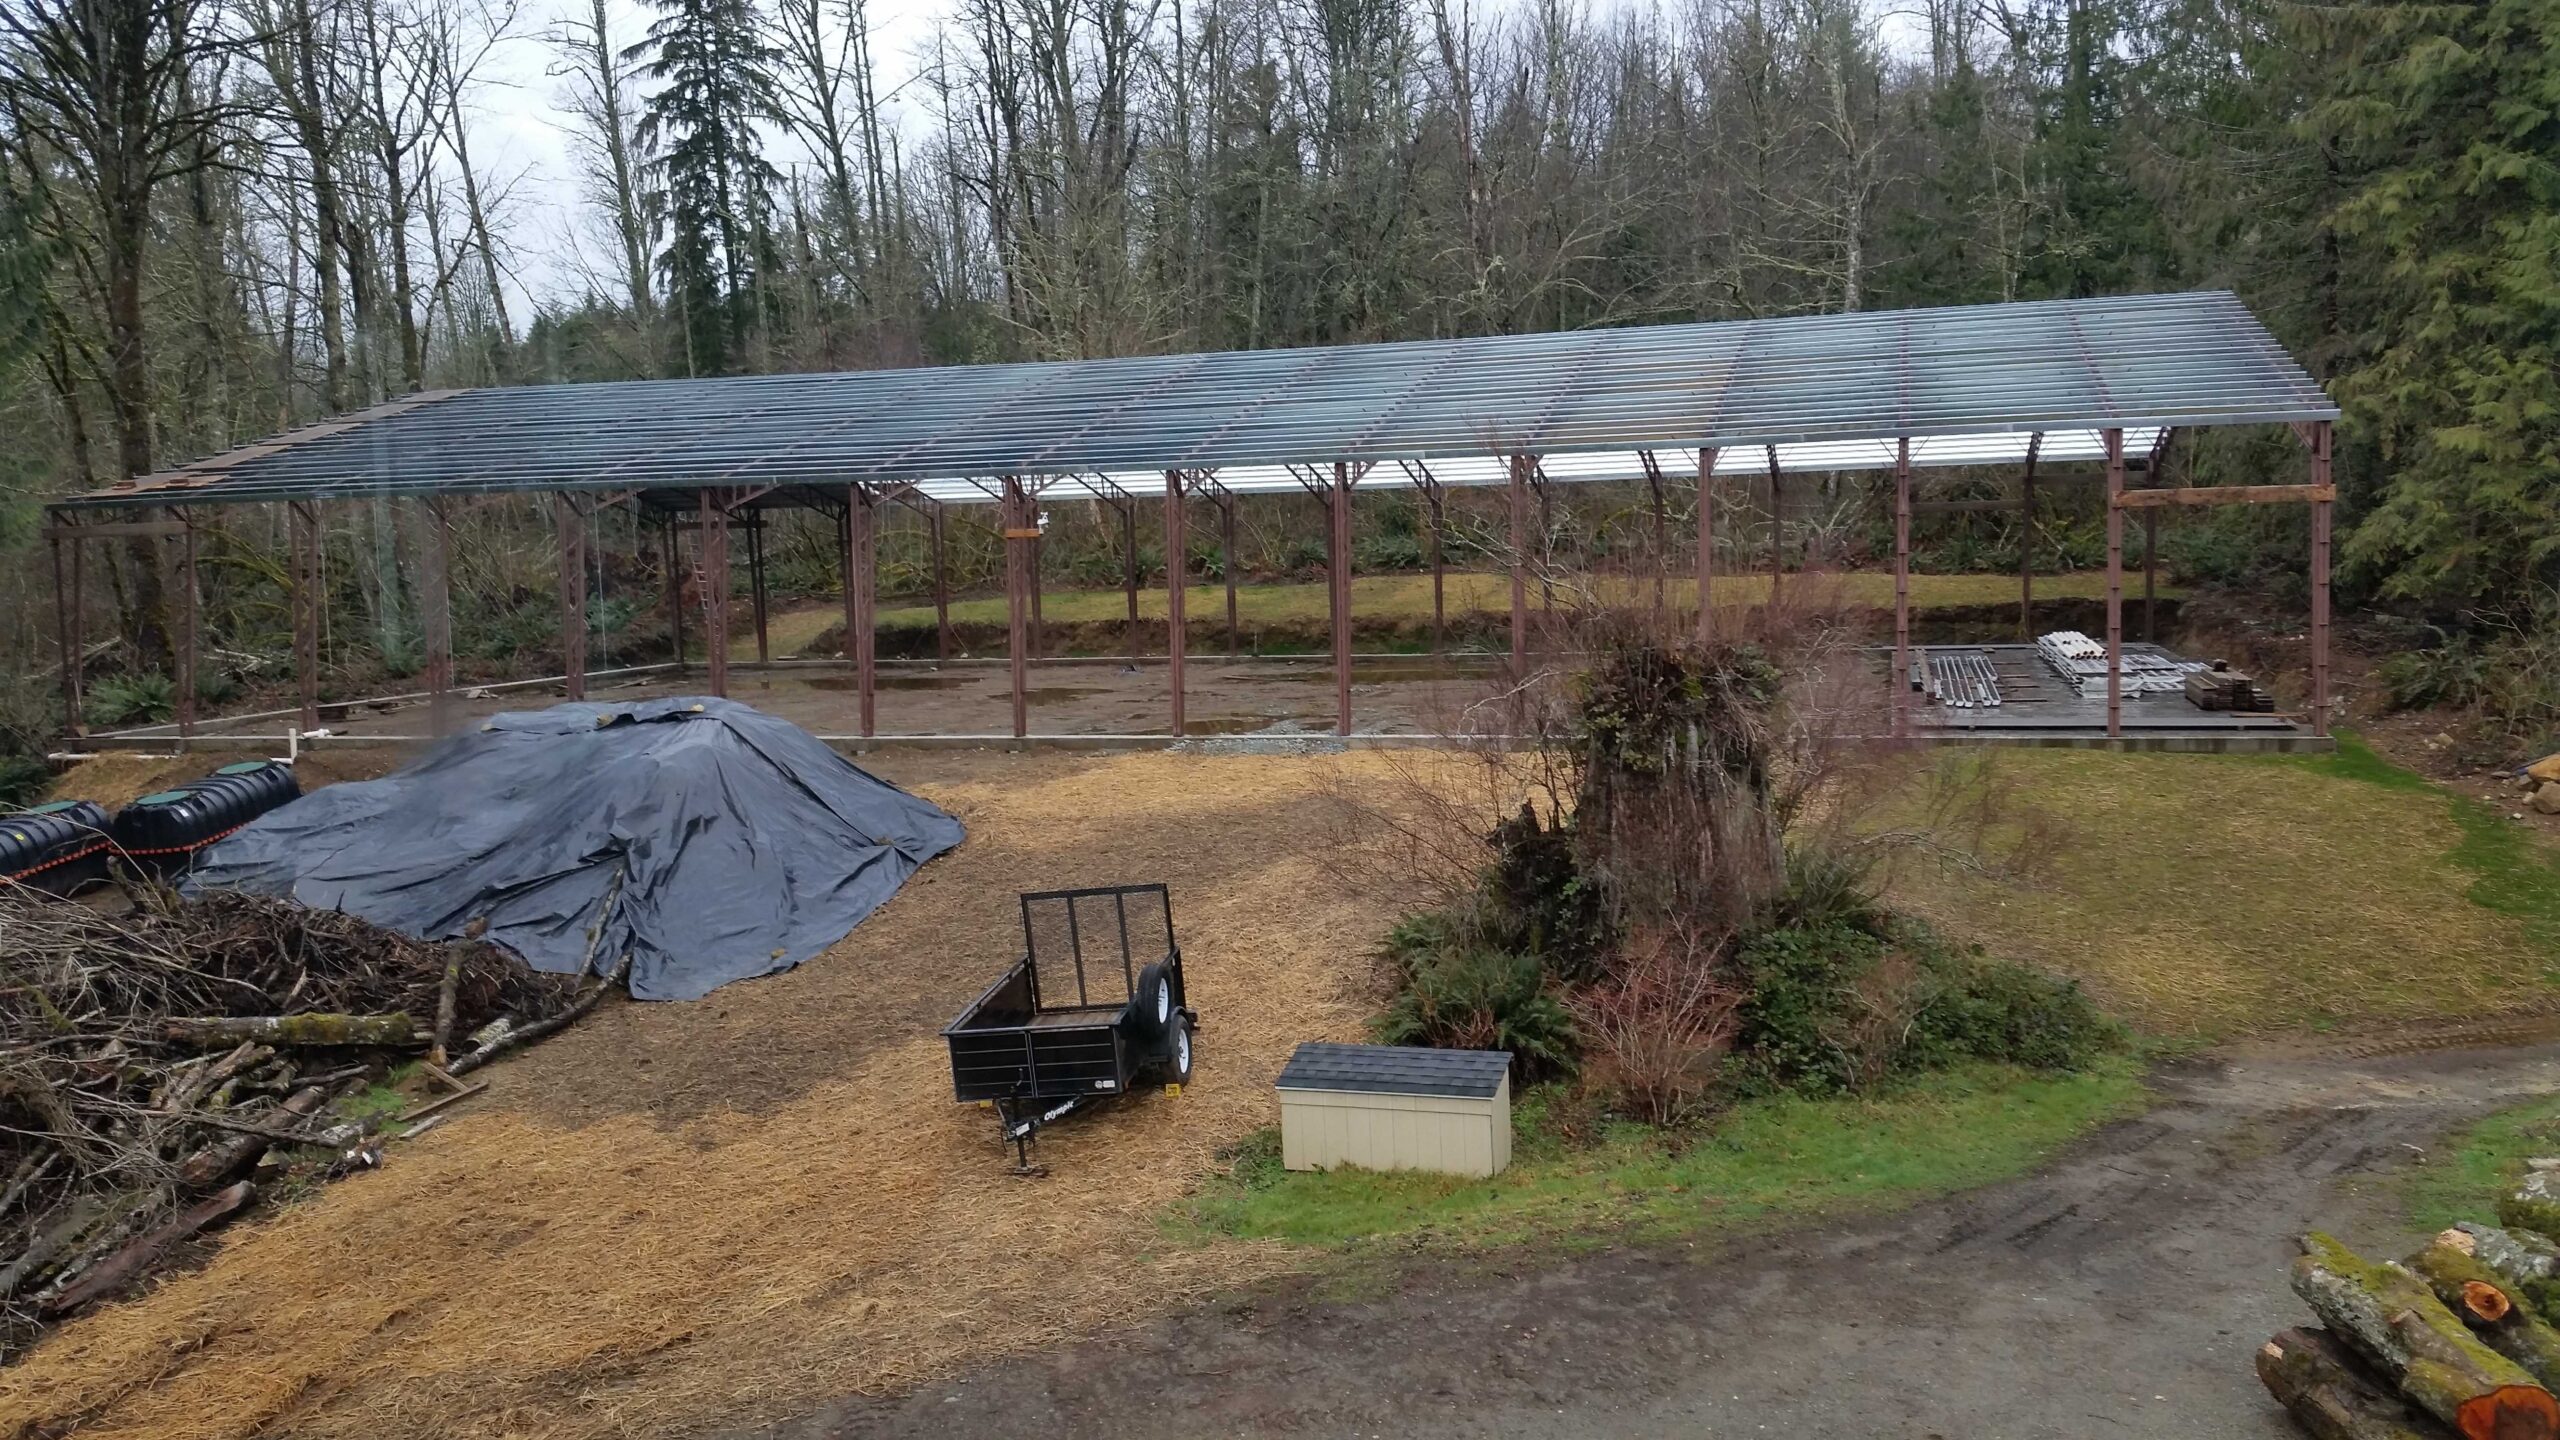
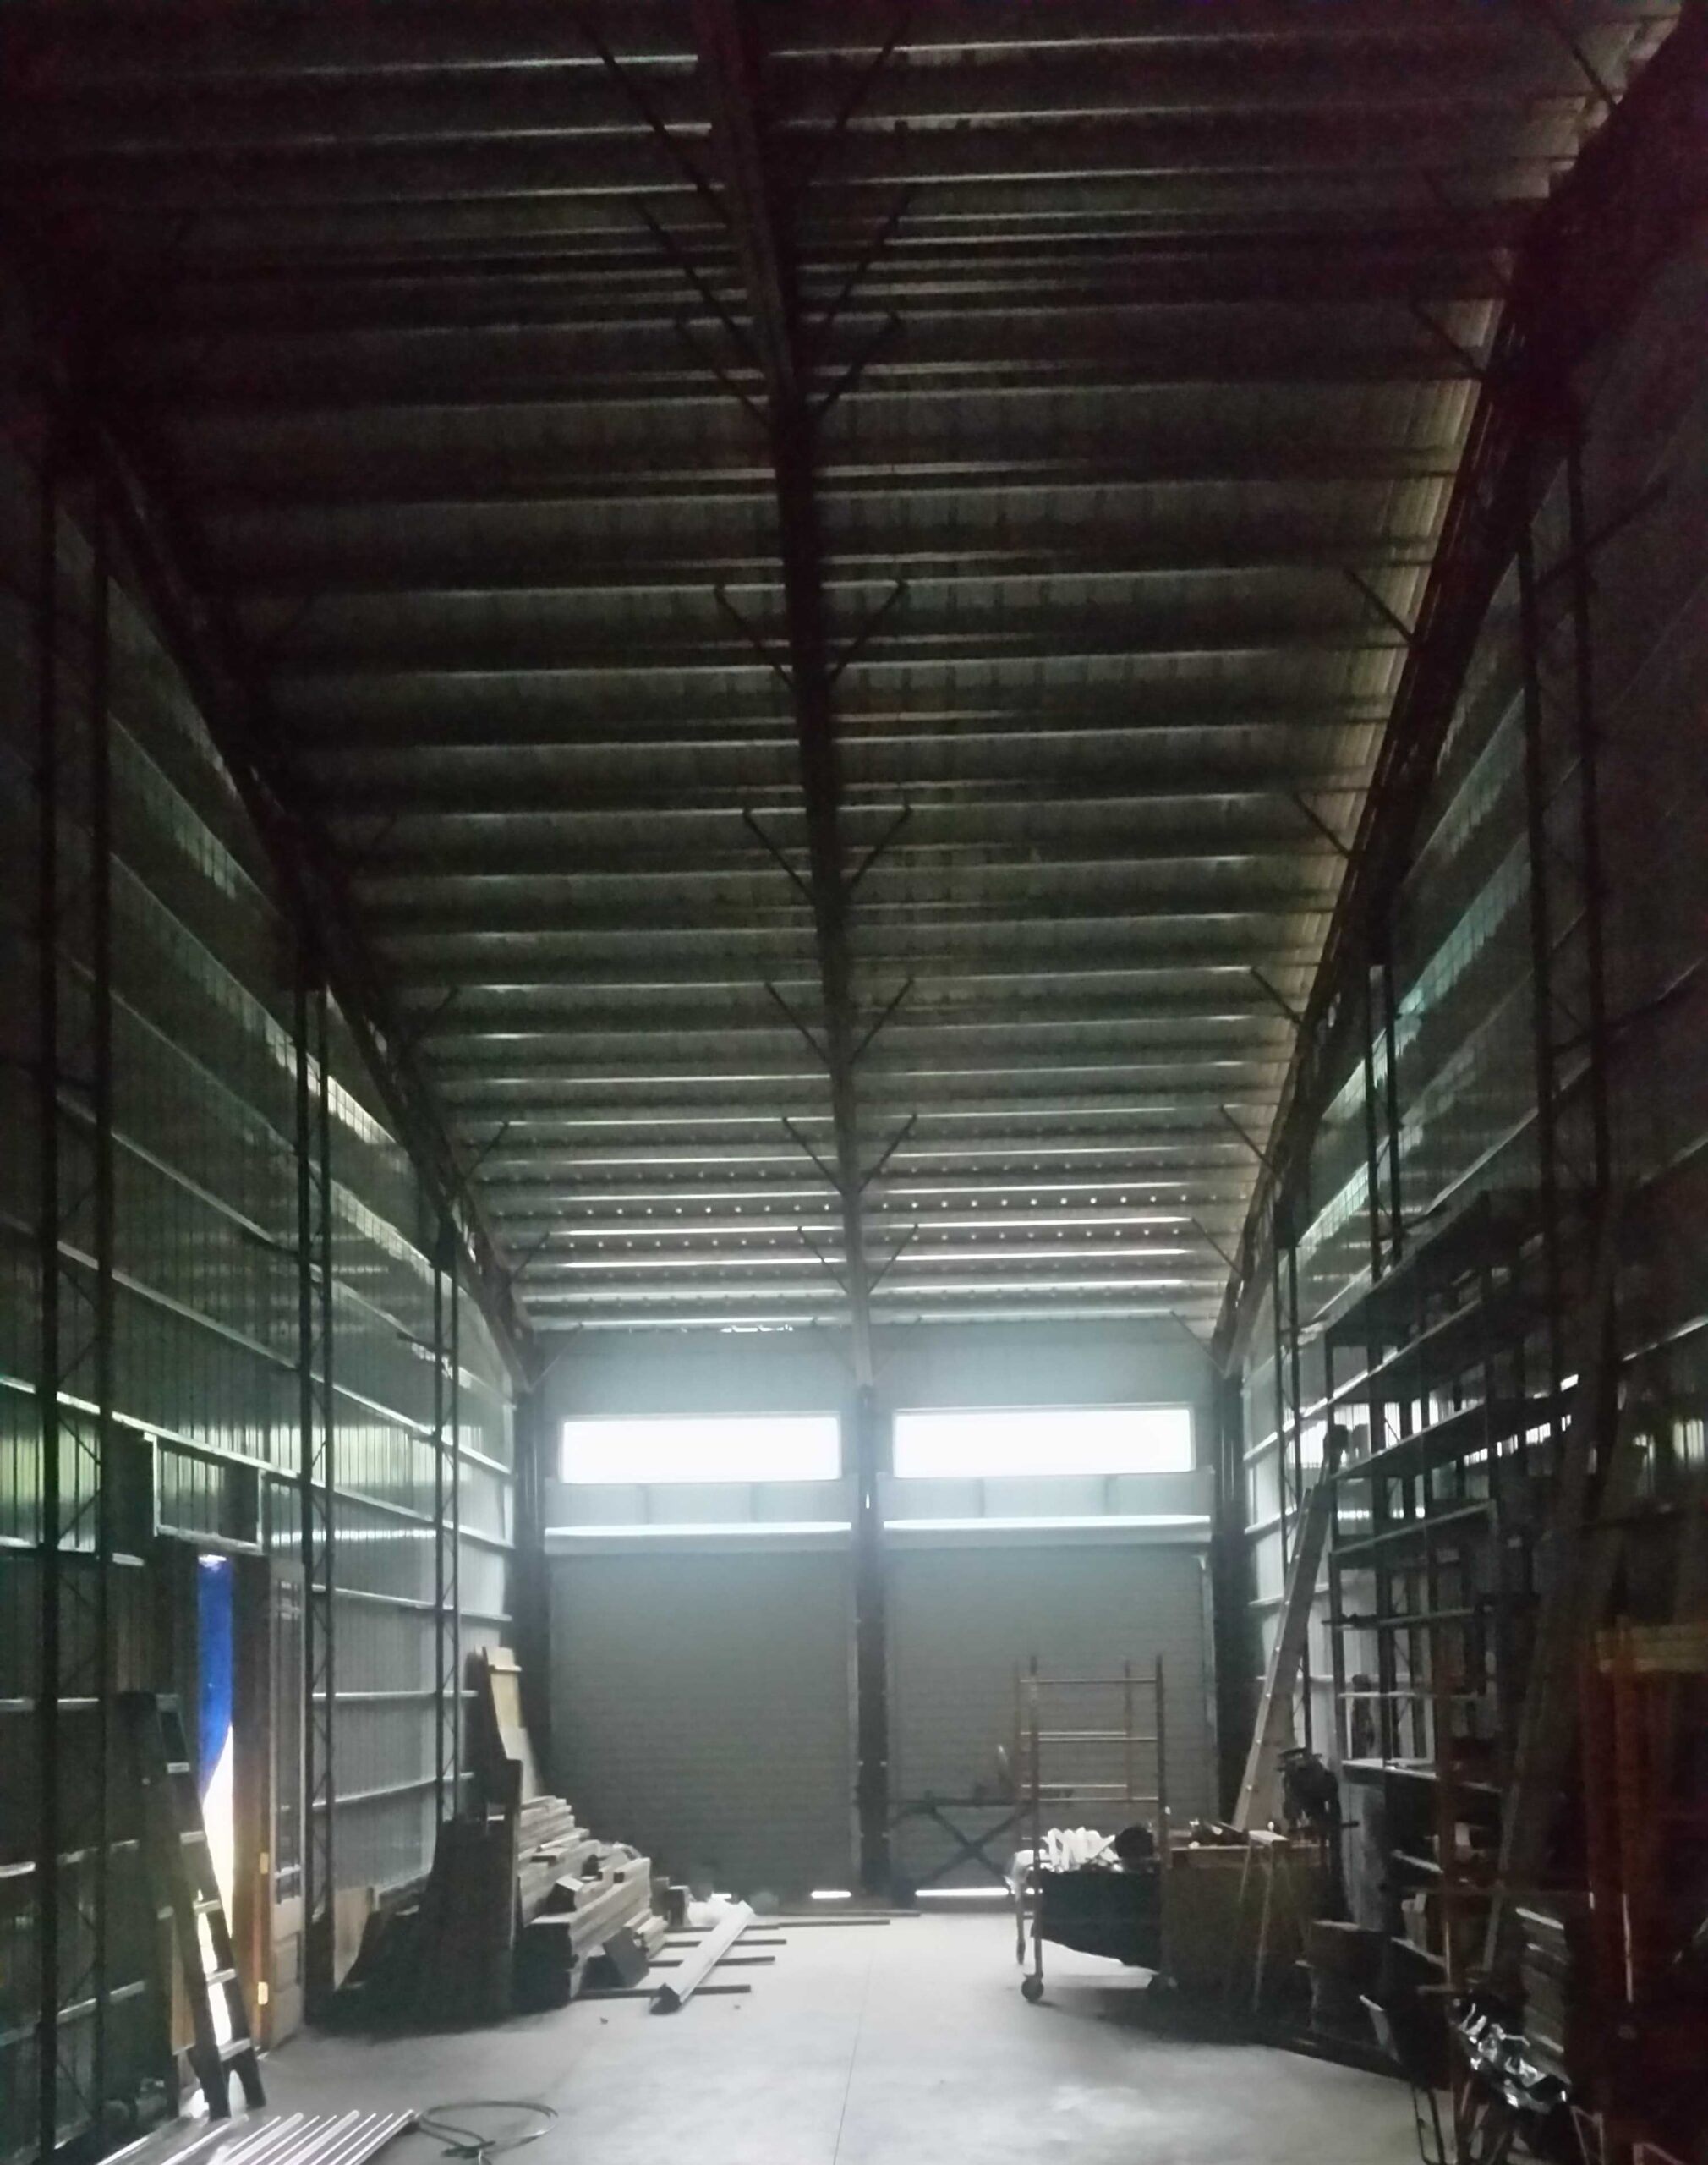
Roof Purlins
All the columns, trusses, purlins, and wind rods are now installed.
Sheet Metal Roofing
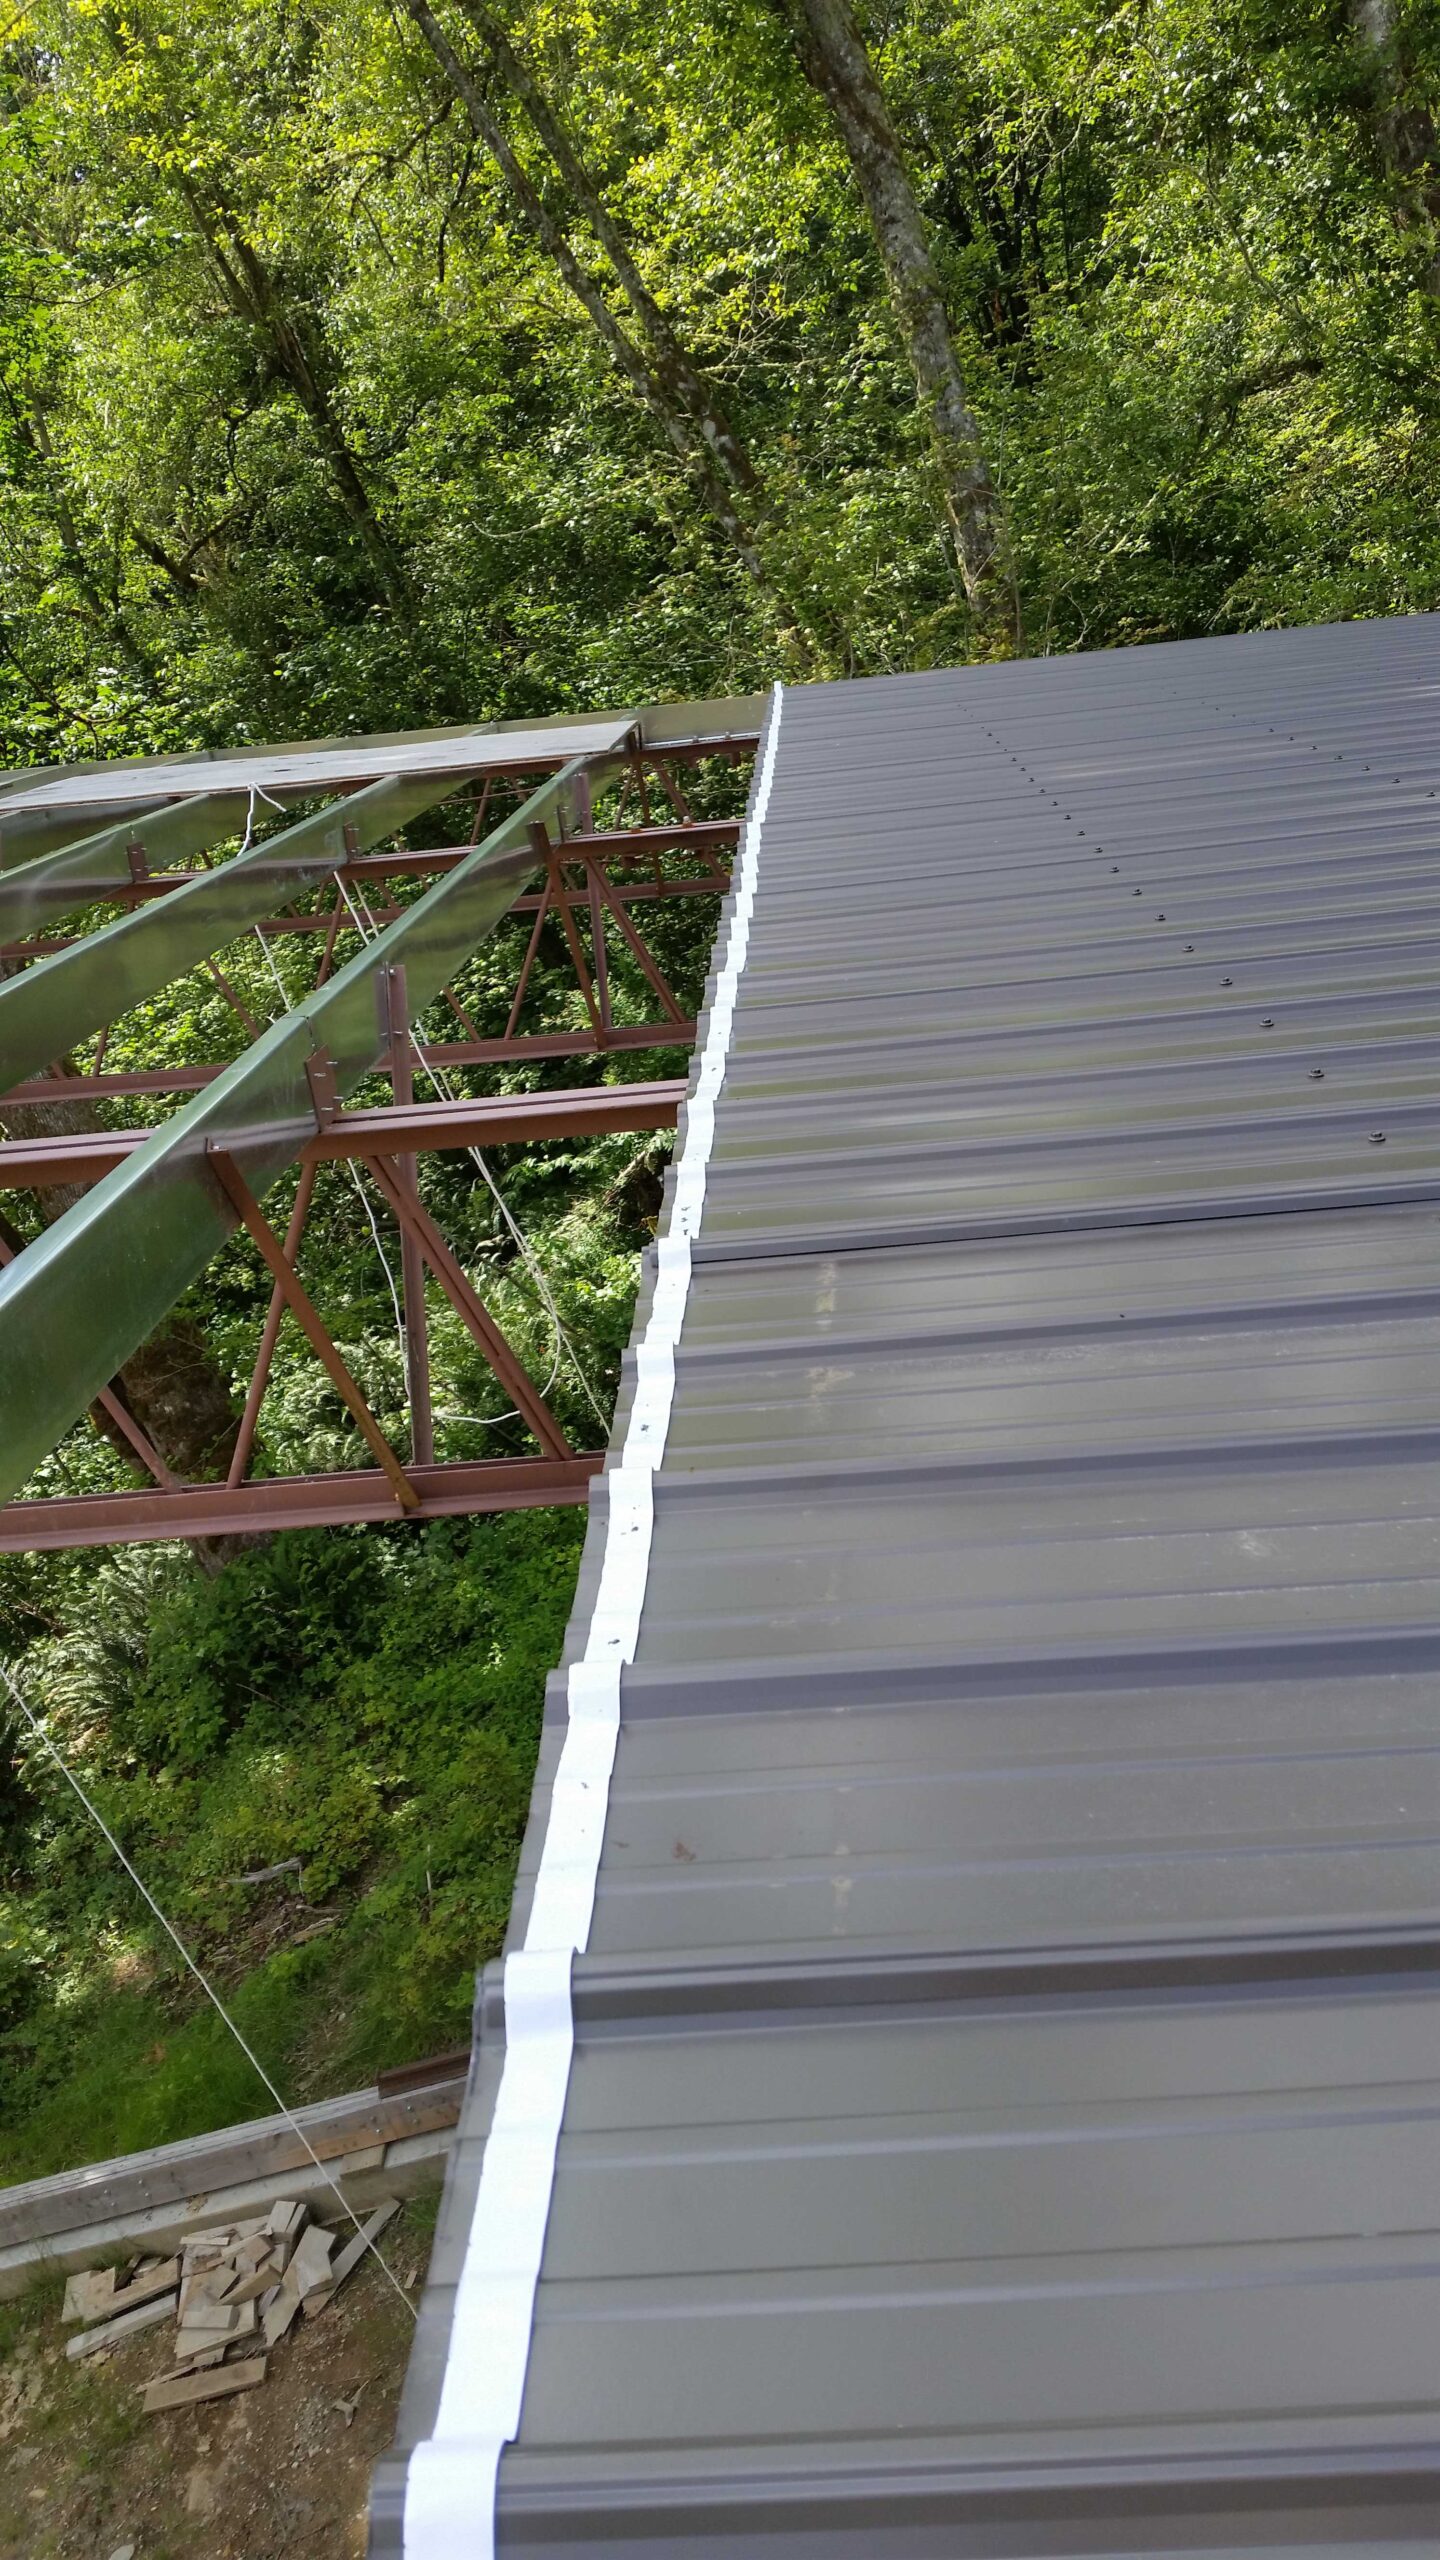
“This shows the butyl tape installed and ready for overlapping the top sheet of metal. I cut the 40 foot lengths into lengths that allowed me to have about 4 inches of overlap directly over a purlin. To make it work, I had to cut each sheet at just the right length and put one sheet on the front of the building and the other on the back of the building. This allowed me to have factory edges on all exposed edges. The lengths were about 22 ft and 18 ft. Julia said I needed to span two purlins to prevent wicking, but that just wasn’t an option with the 40 foot sheets. This is plenty strong, and I am happy to say there aren’t any leaks past the butyl tape even with only 5 inches of overlap.” ~Dean
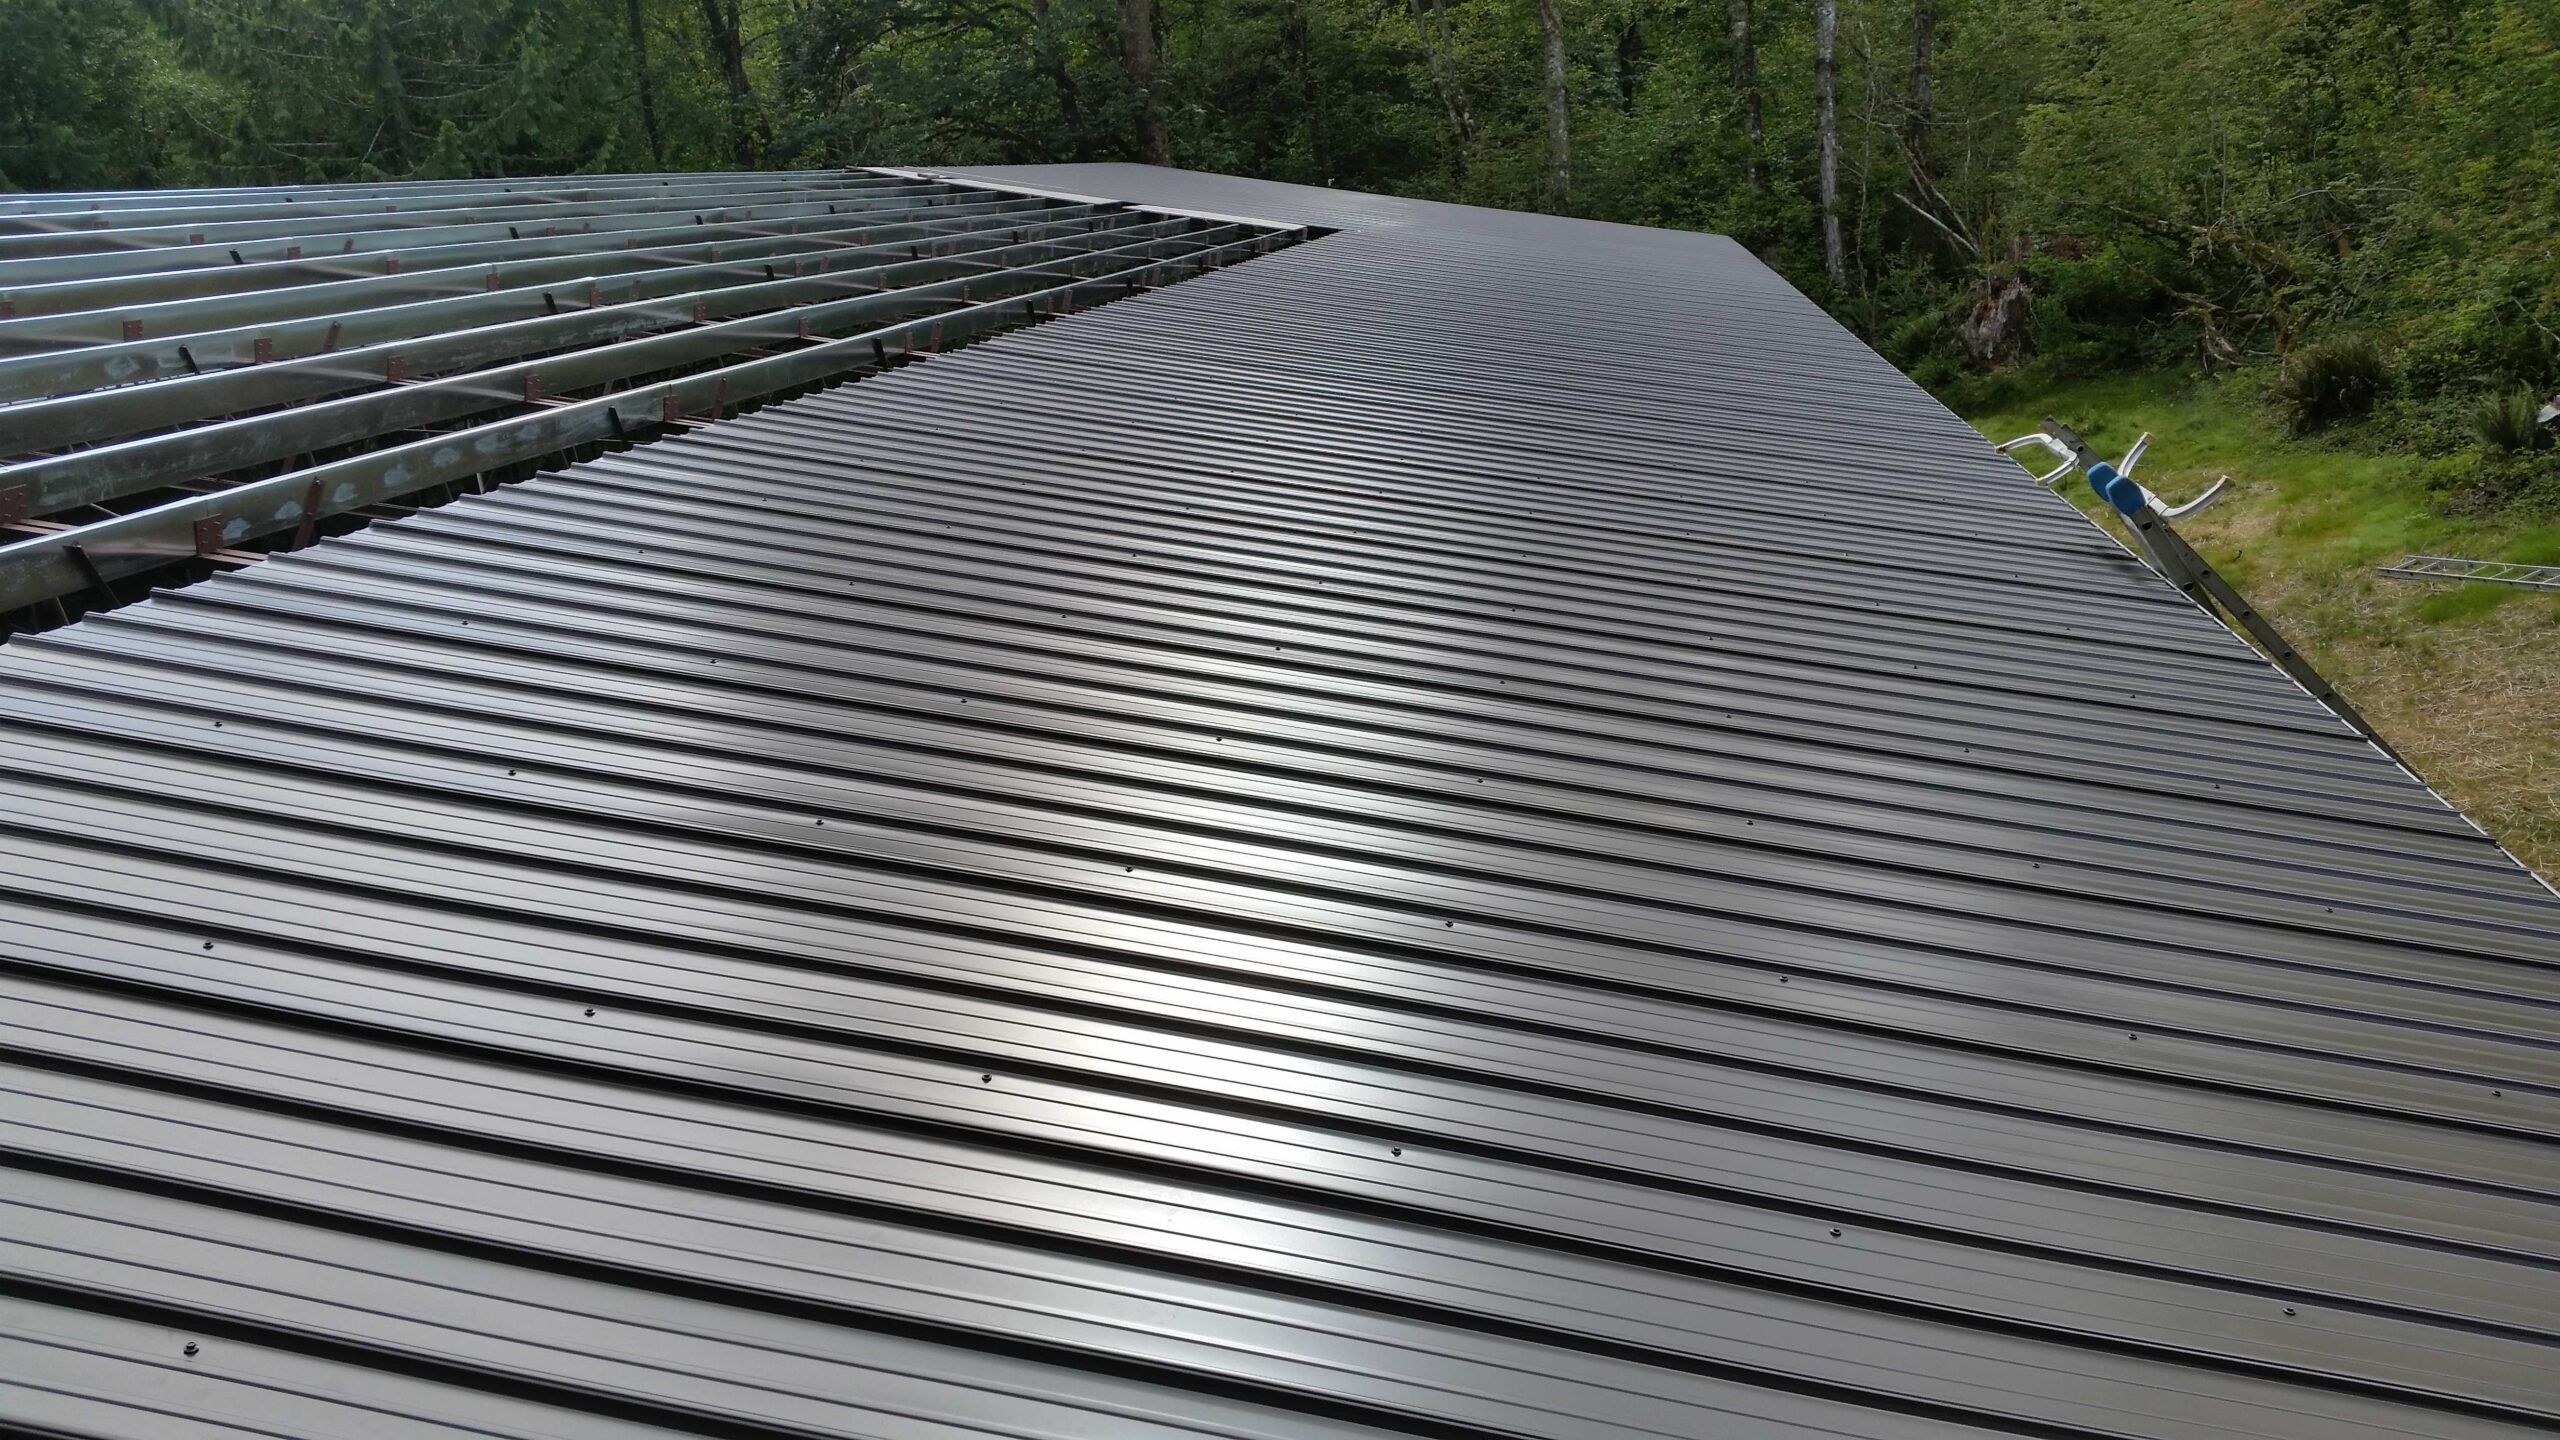
Raising the Roof Metal
“This photo shows the ladders I used to get the roofing up there by myself. On the ground, I would wrap two straps around the sheet to create a taco shape. I could then carry that to the bottom of the extension ladder that has the blue ends on it. You will see it also has a reversed roof spreader bar attached to it to create a u-shaped place to hold the sheet in place. I then set one end of the metal taco on the ground and lifted it vertically against the ladder, into the u-shaped support. On the roof, I then lifted the metal up little by little by letting it rest on the rungs of the extension ladder until I had half above my shoulder length. Then I could tilt it onto my shoulder and carry it across the roof. This process was made a tiny bit easier since the grade on that side of the building was about 4ft higher than the building level.” ~Dean
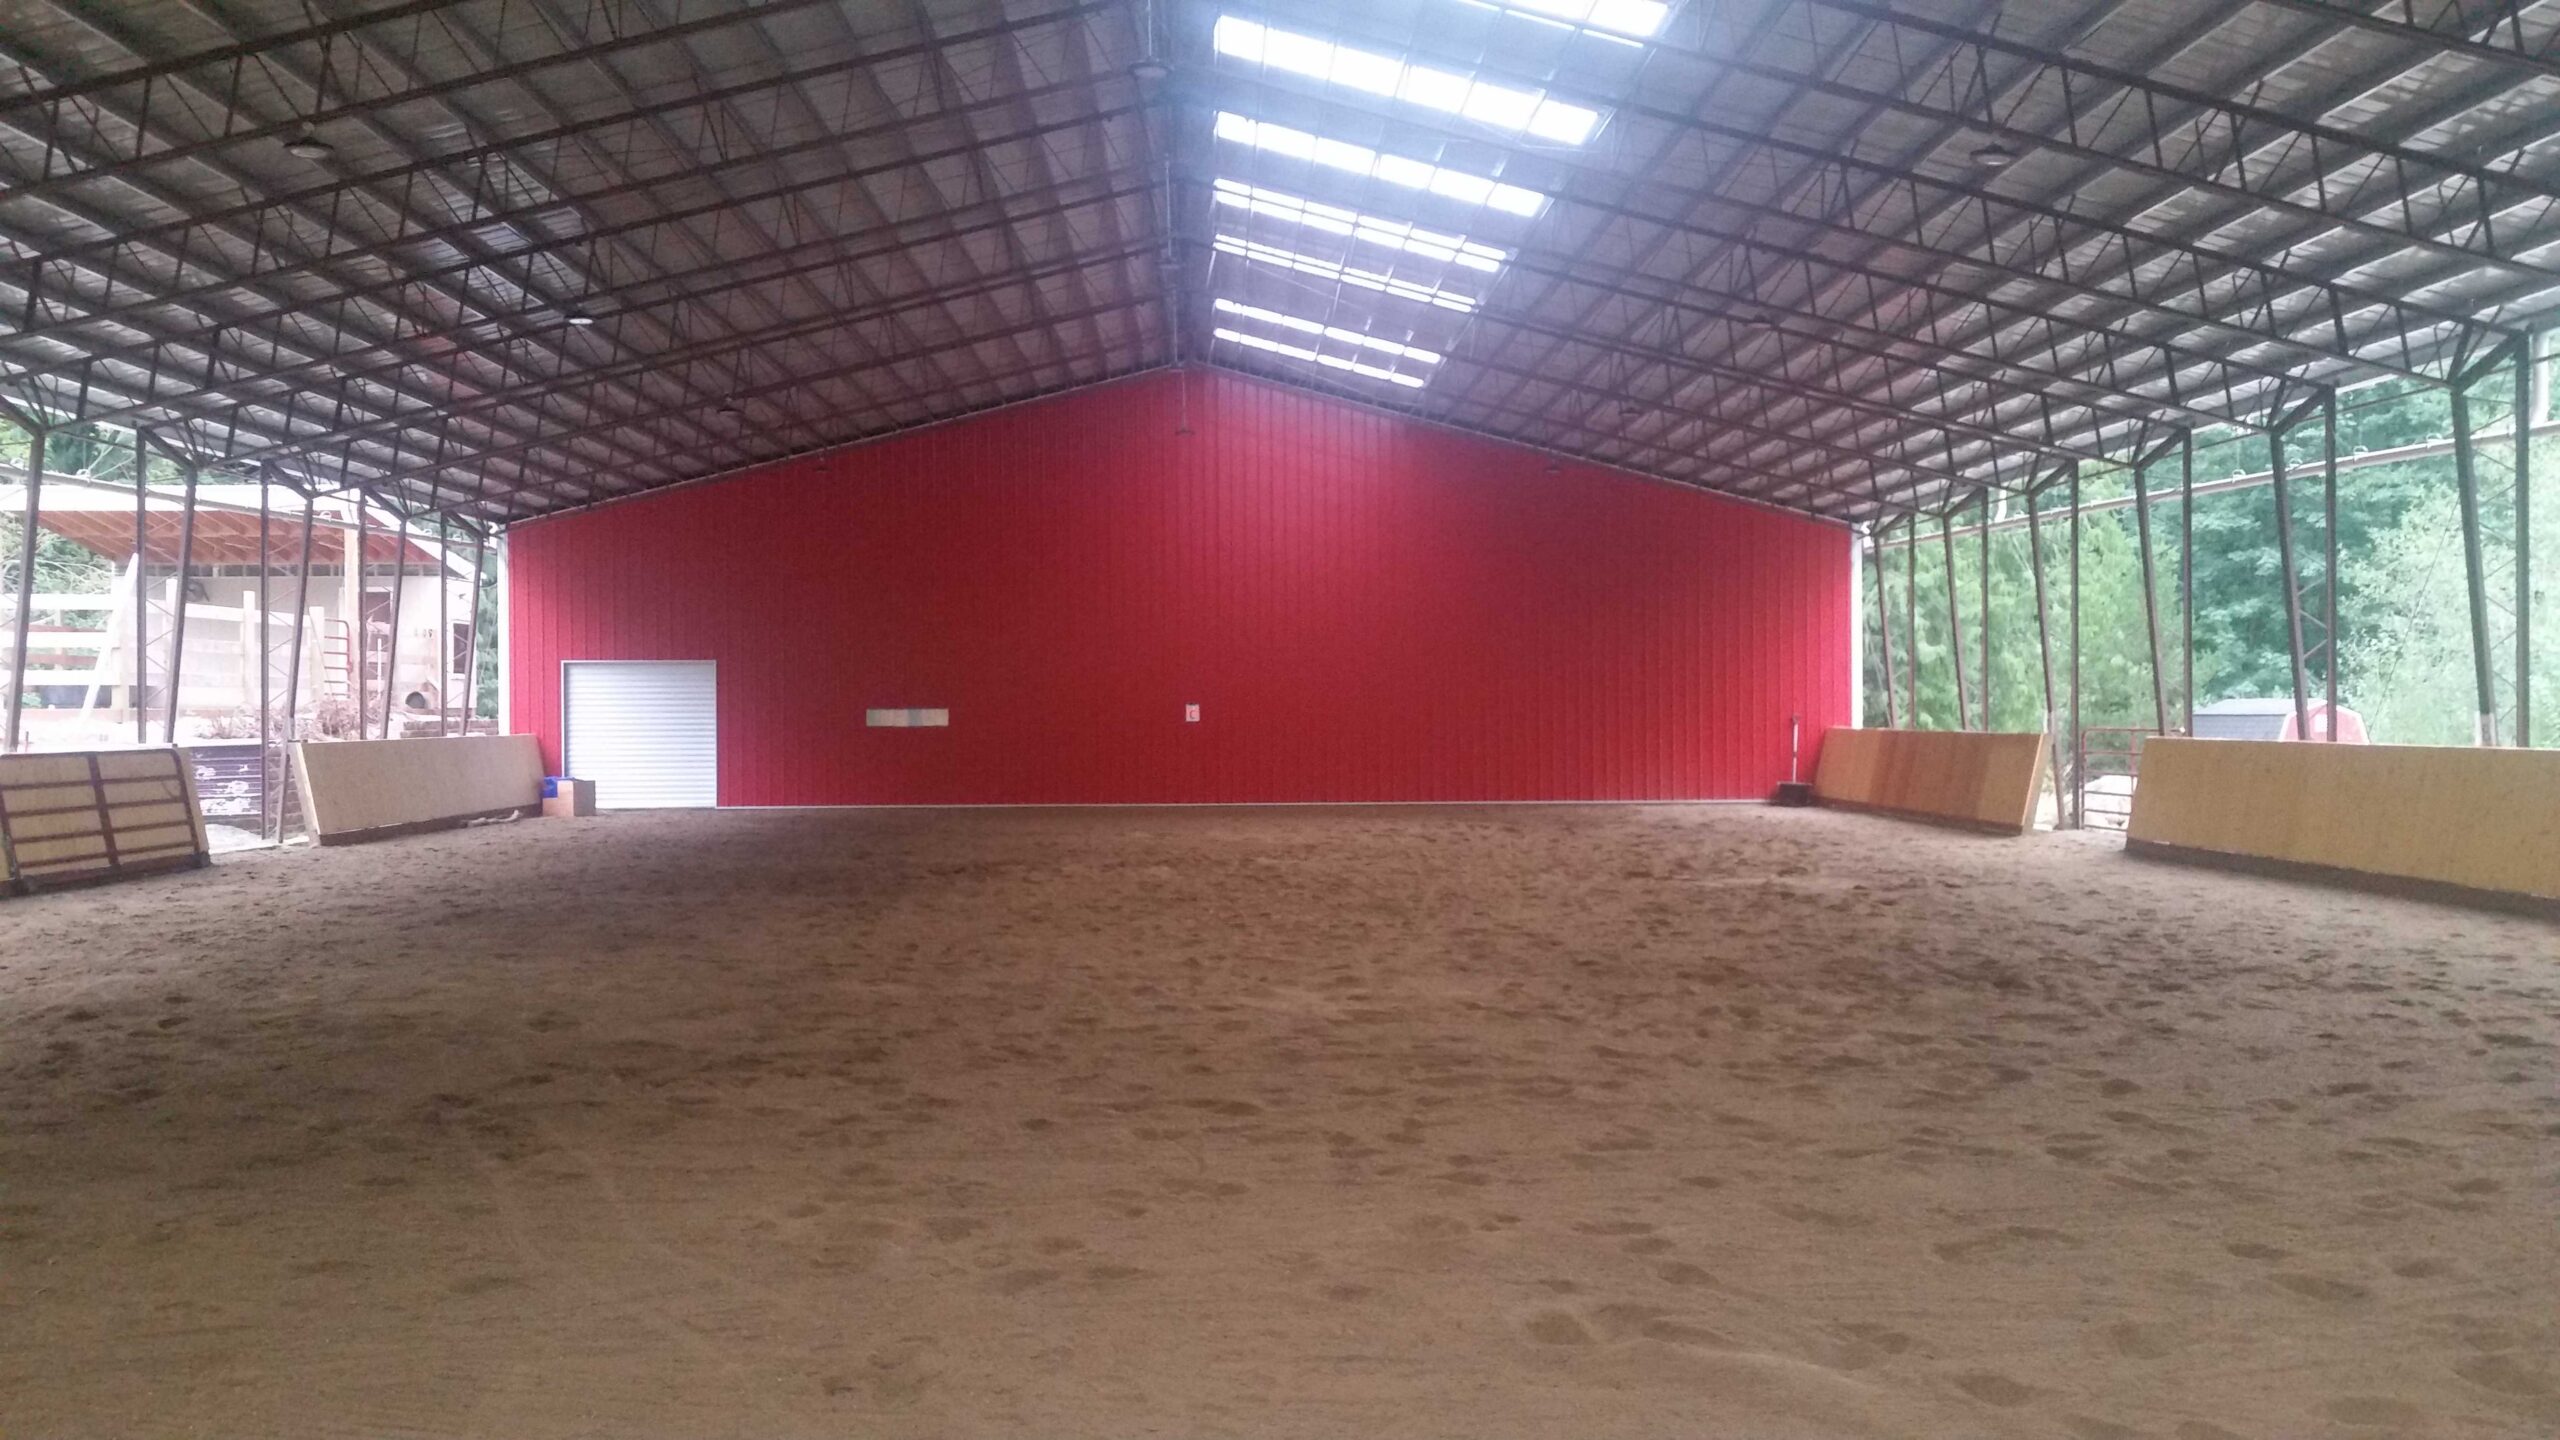
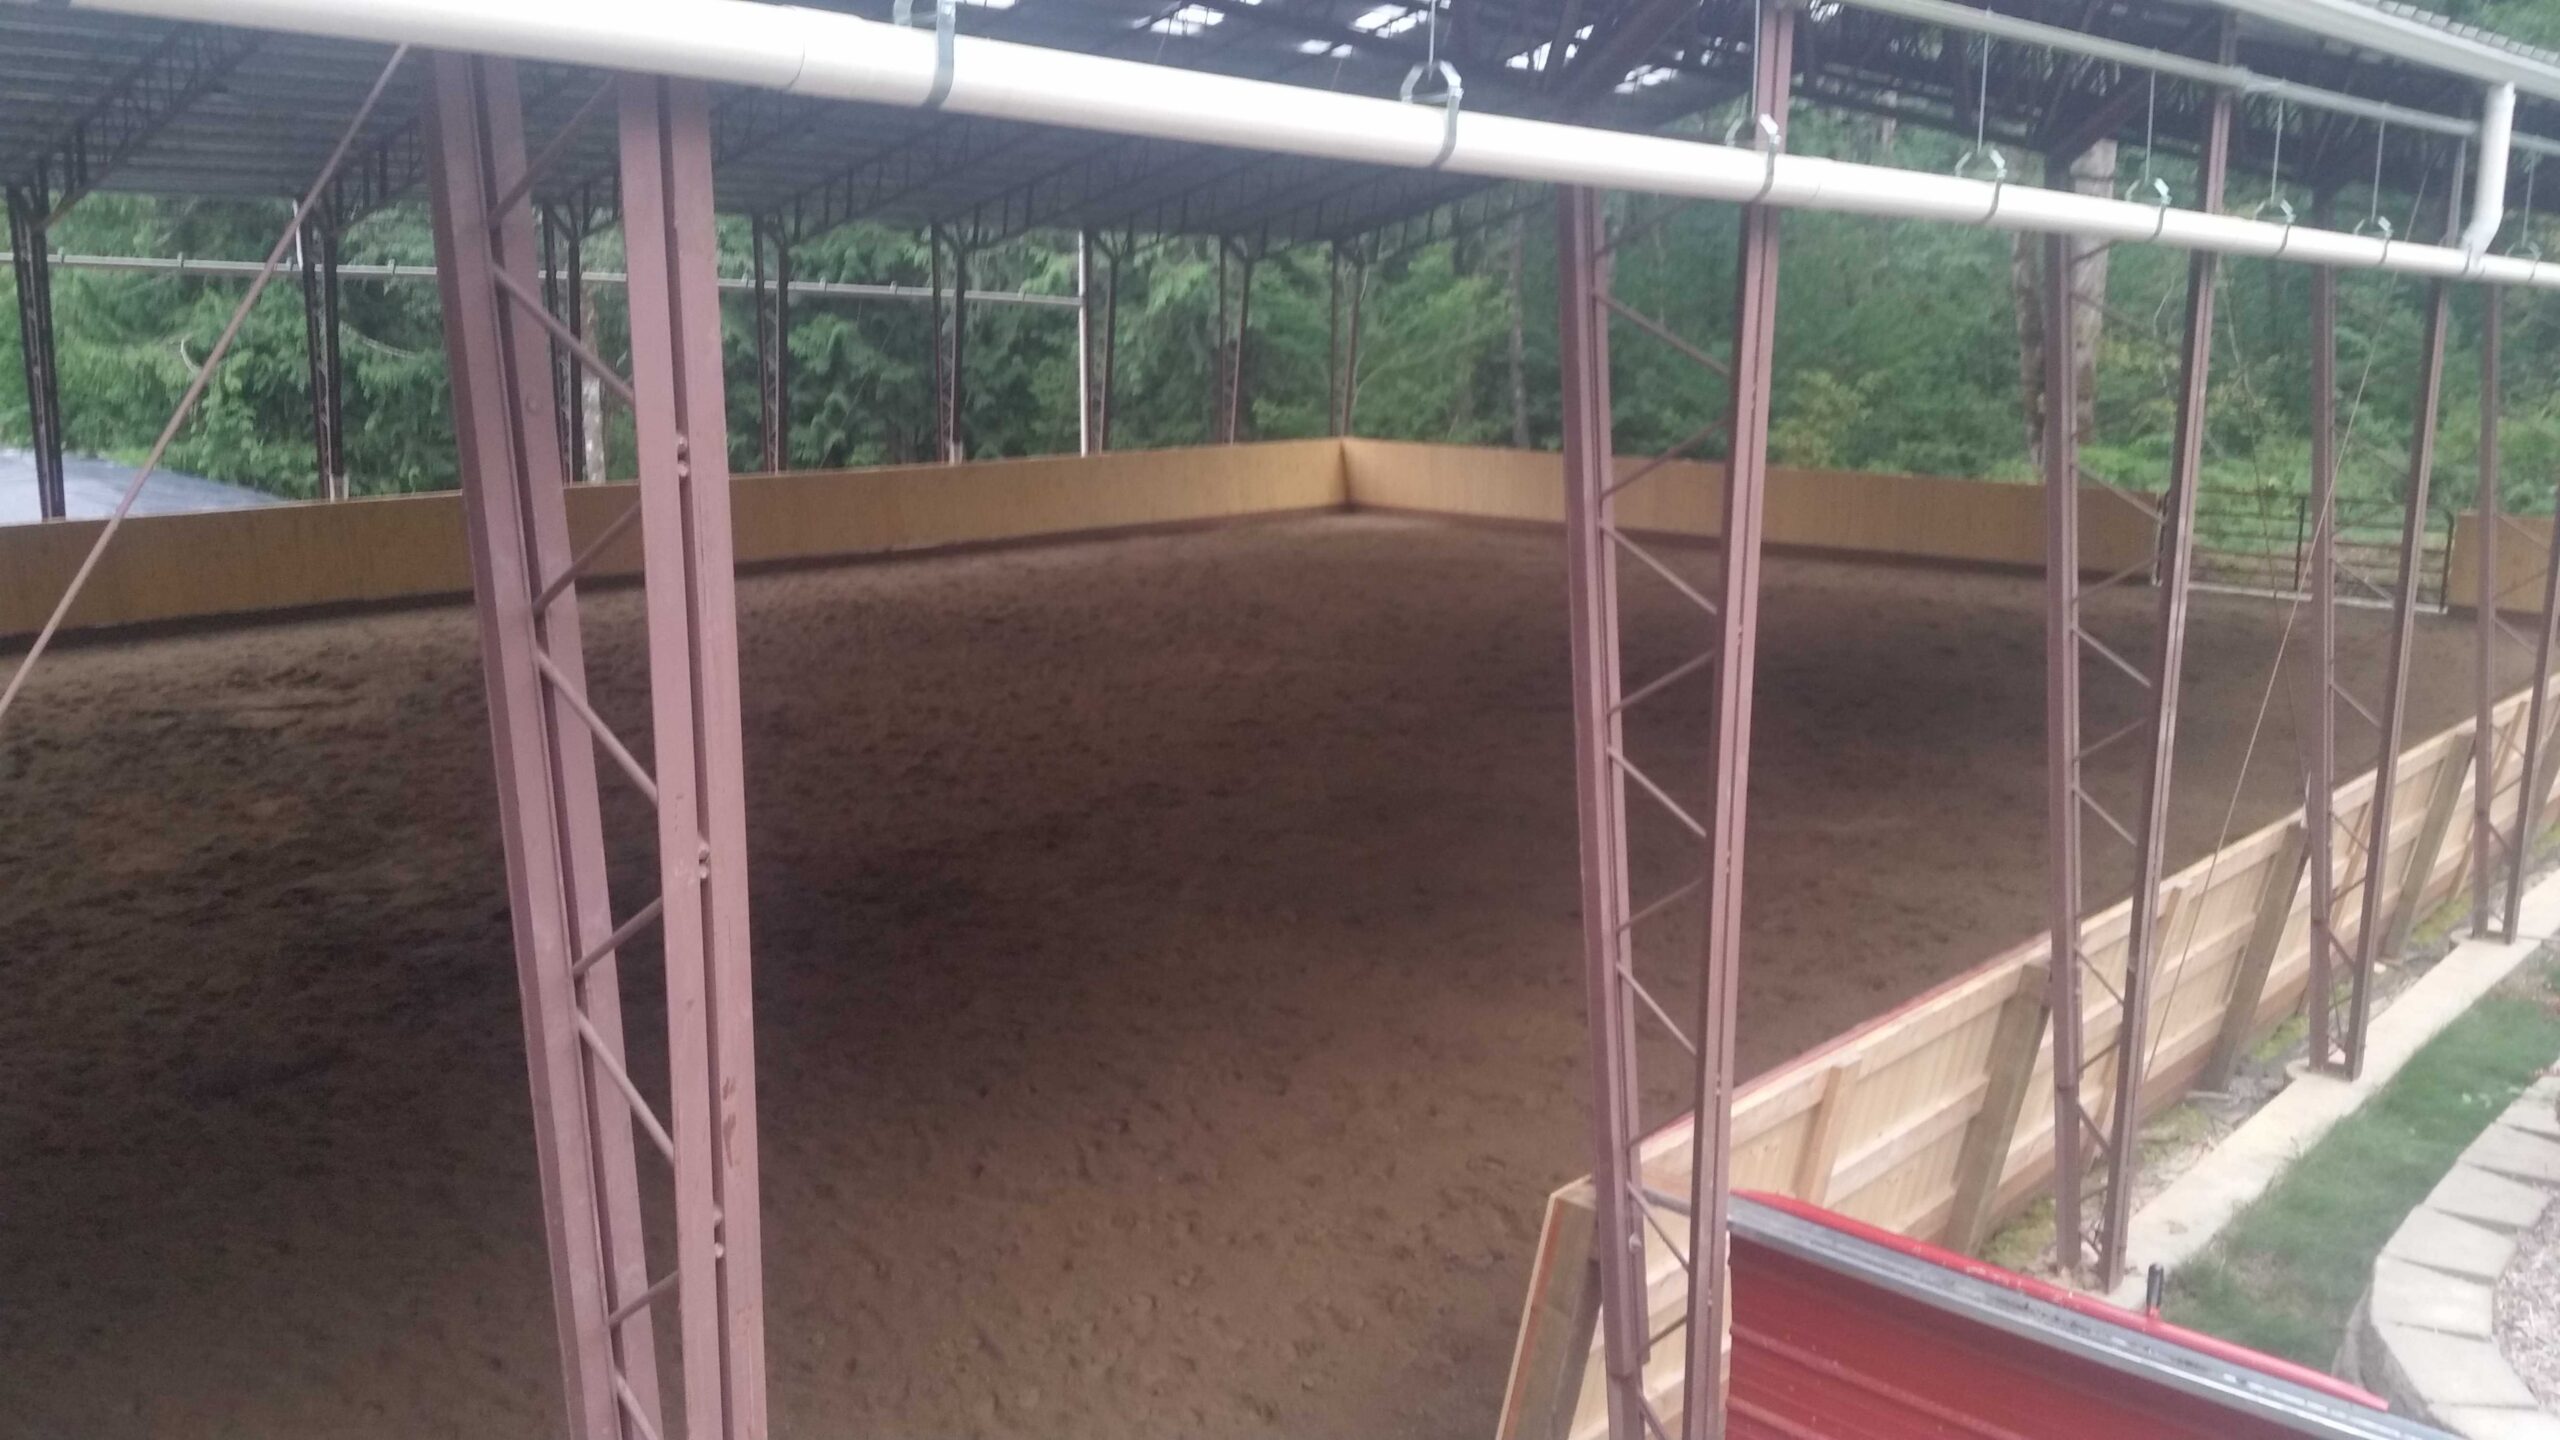
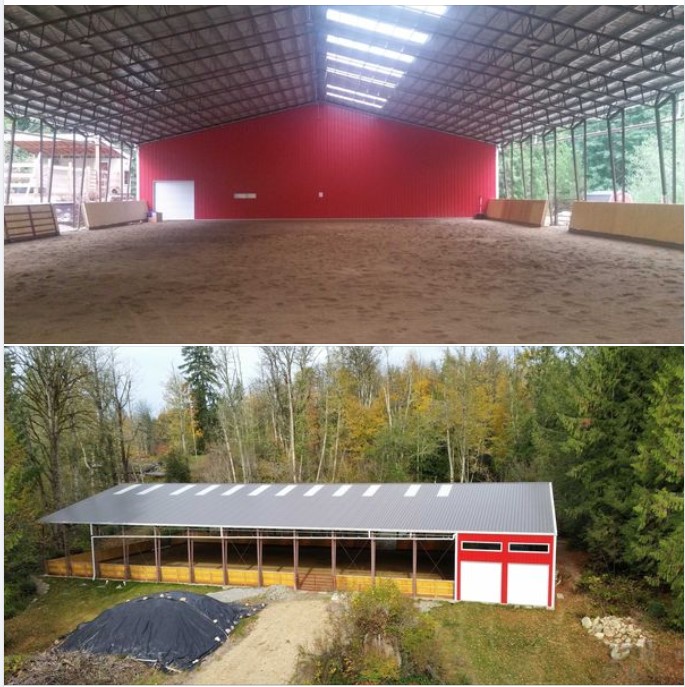
Interior View
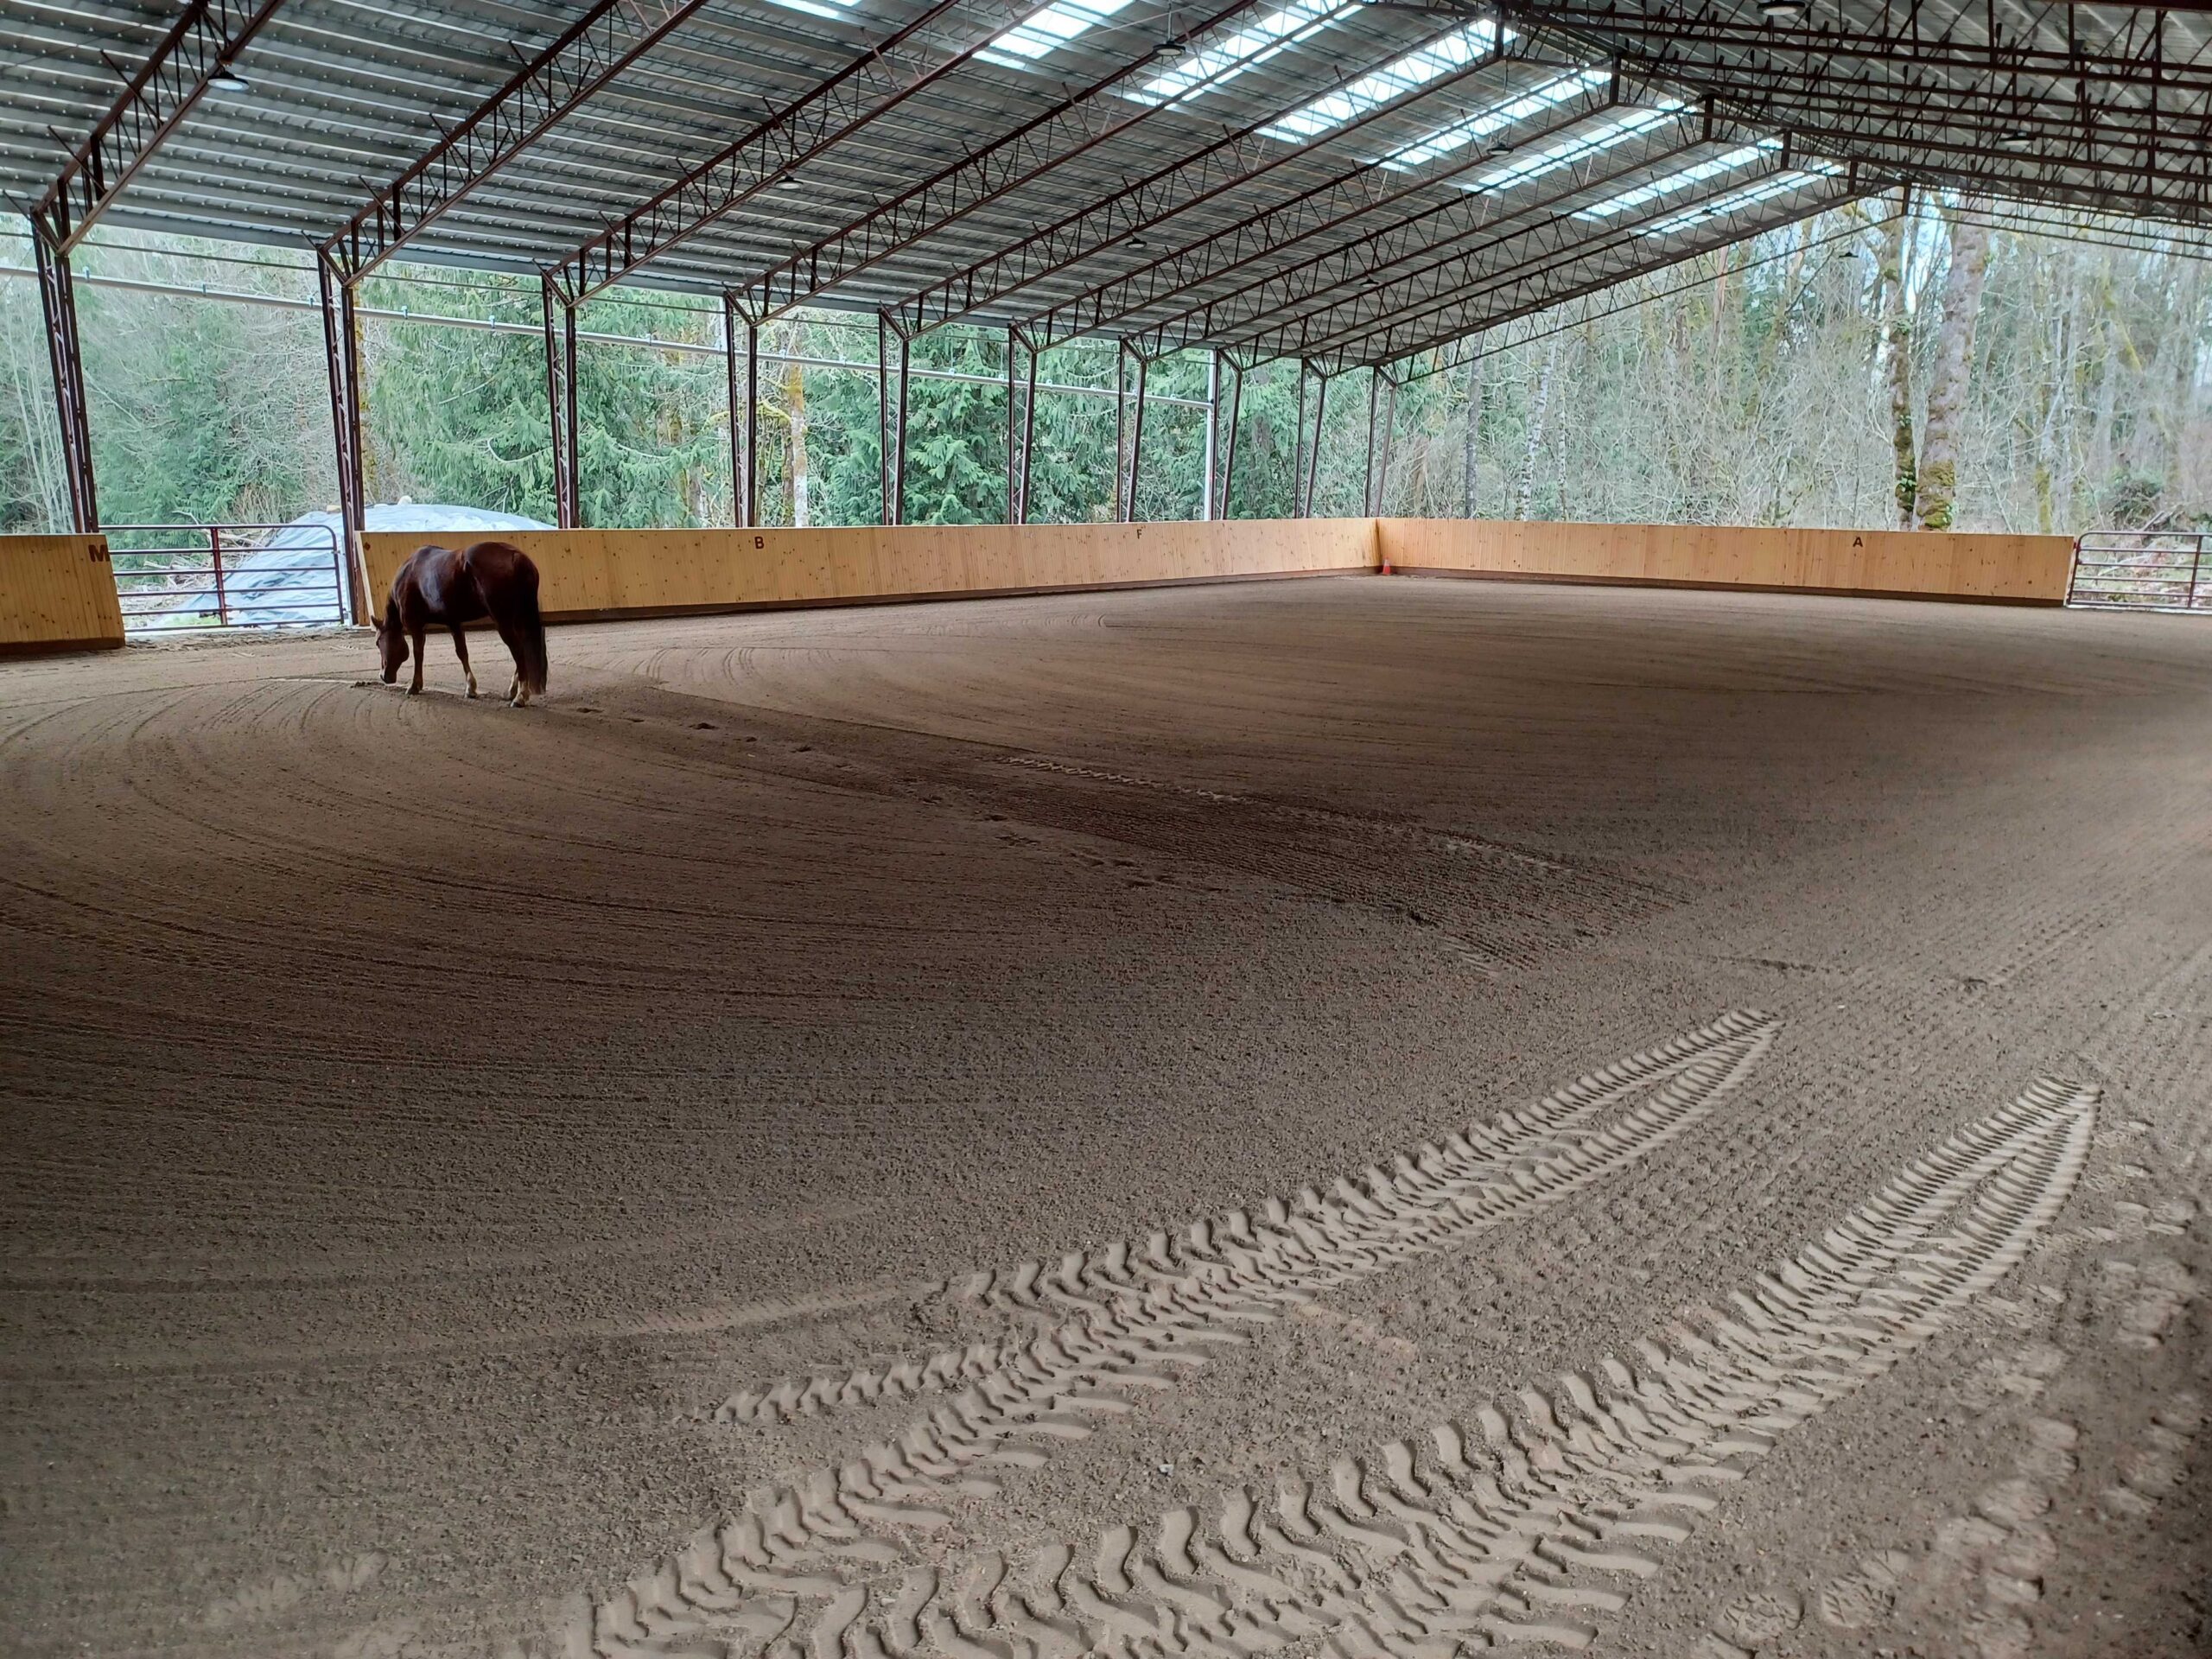
⇧ Clear polycarbonate panels were used to provide natural lighting in the open arena space.
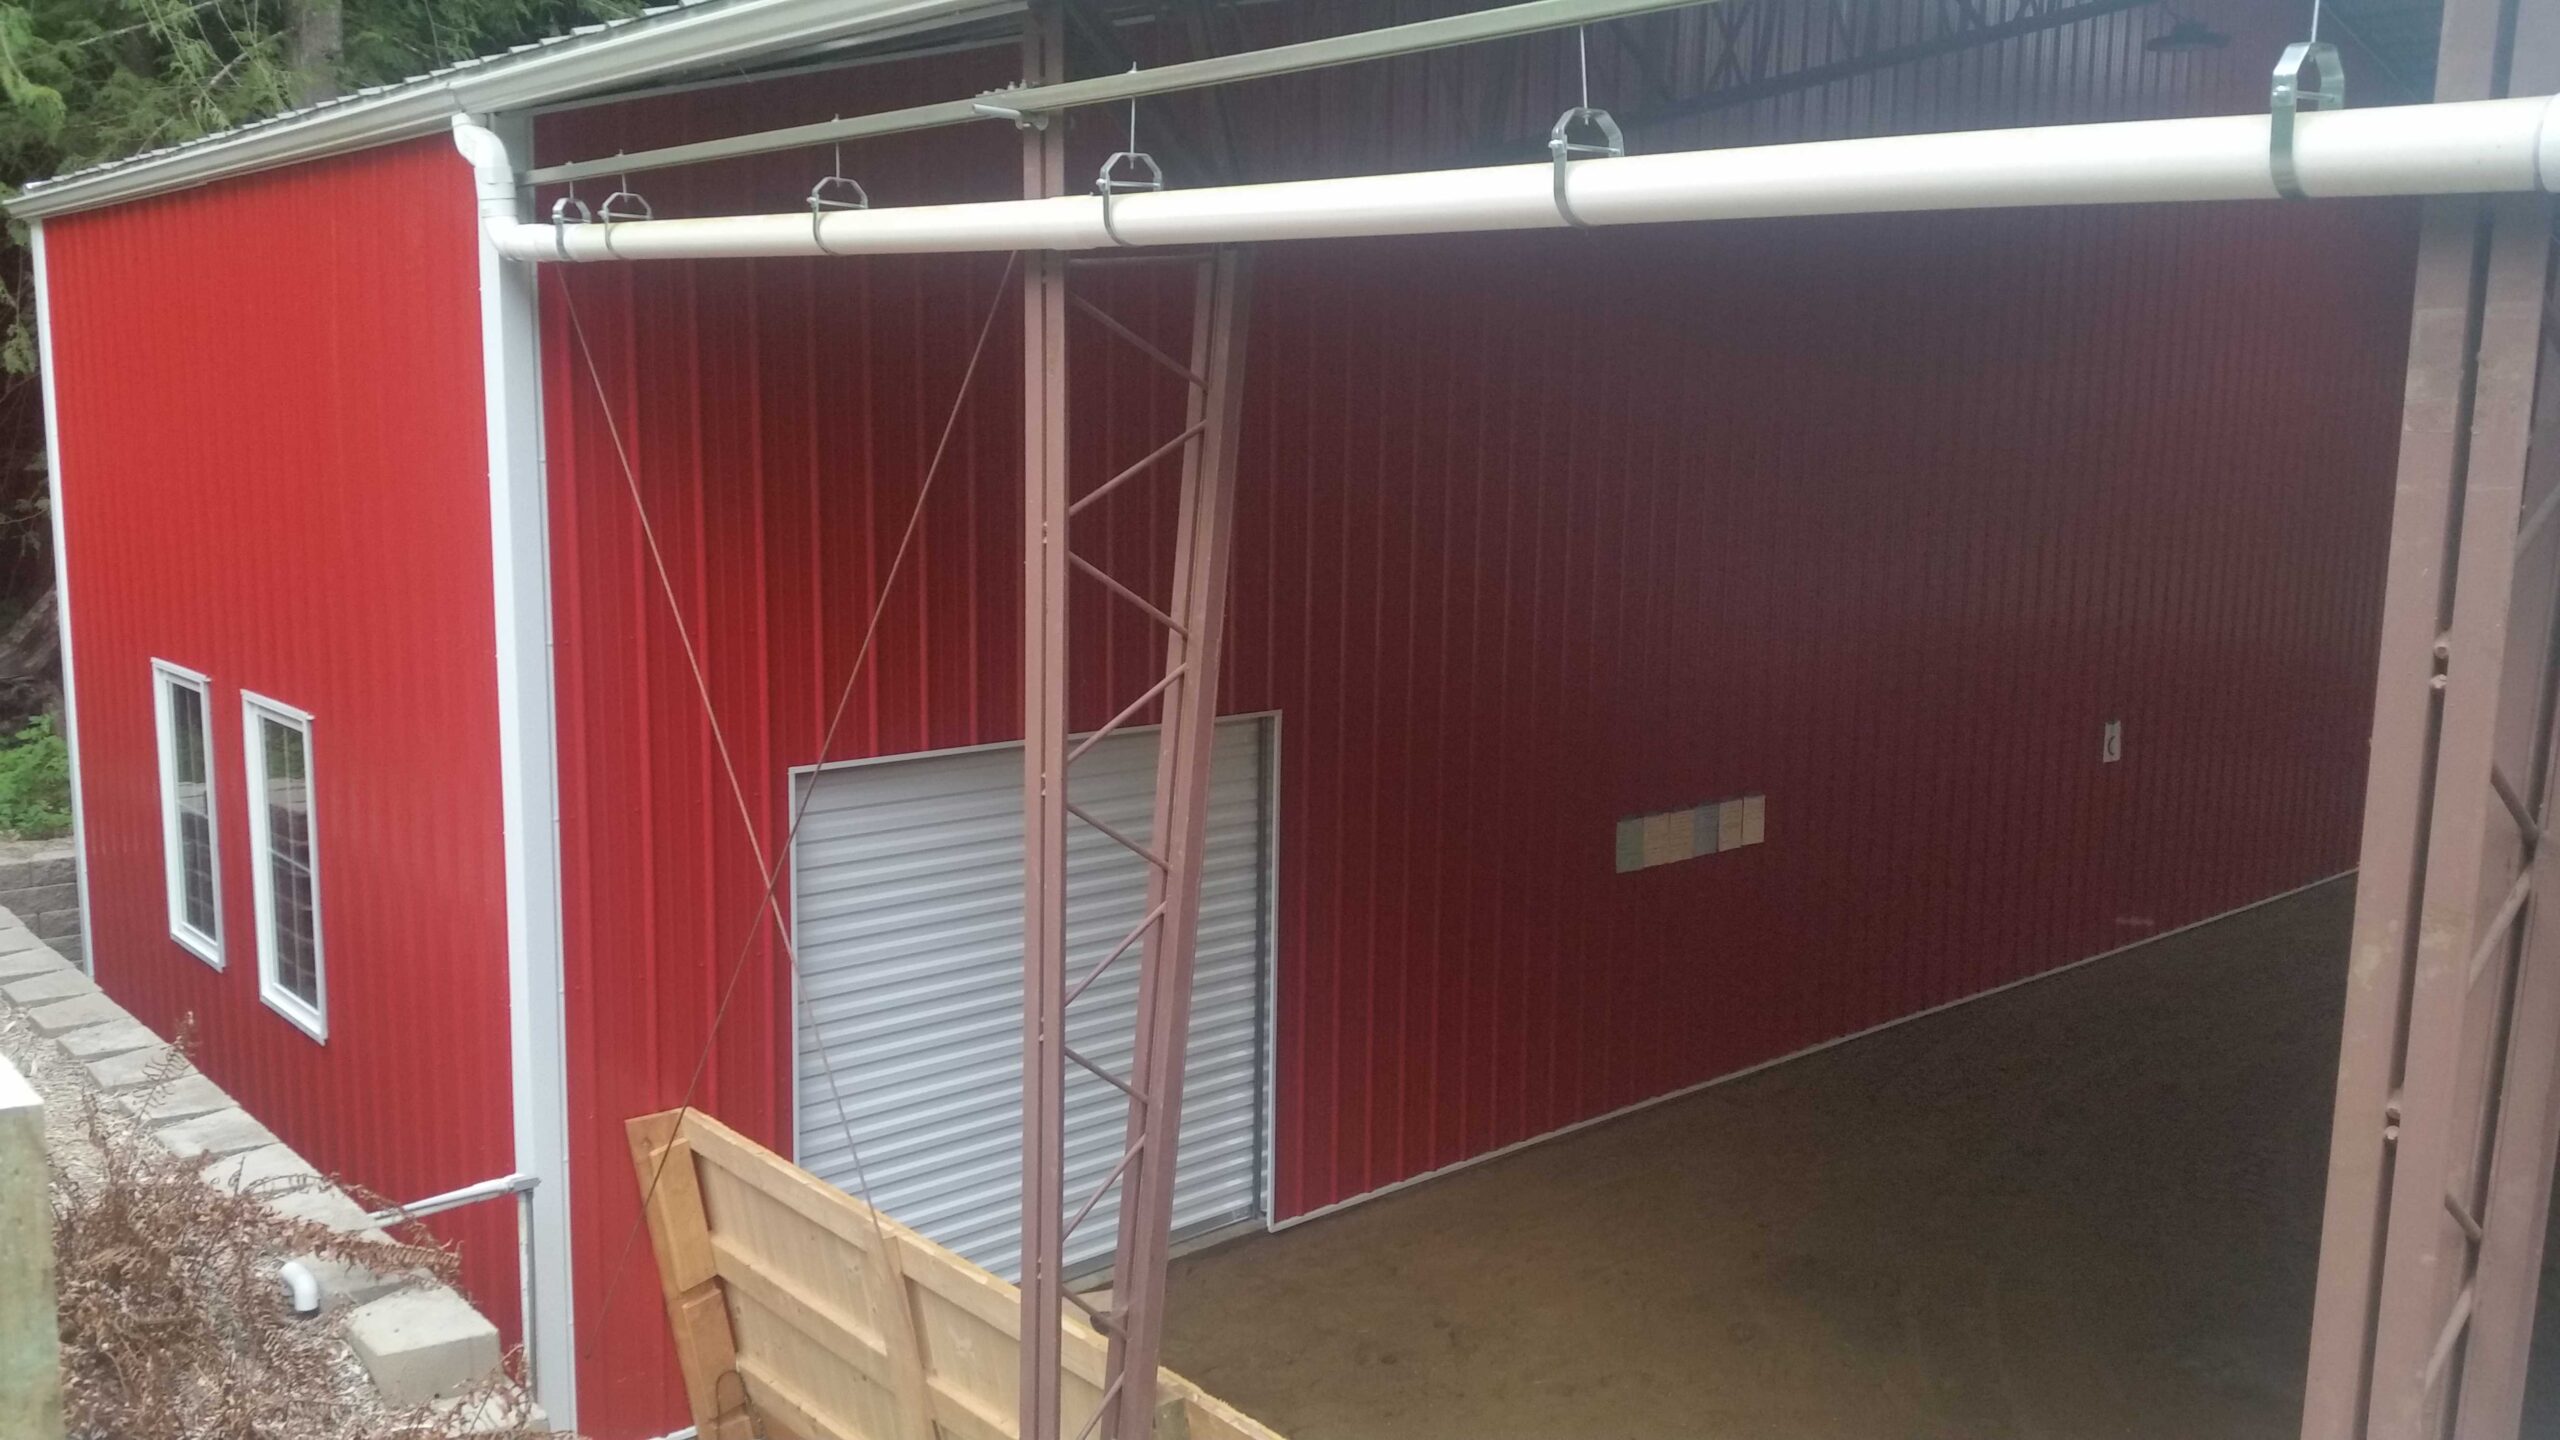
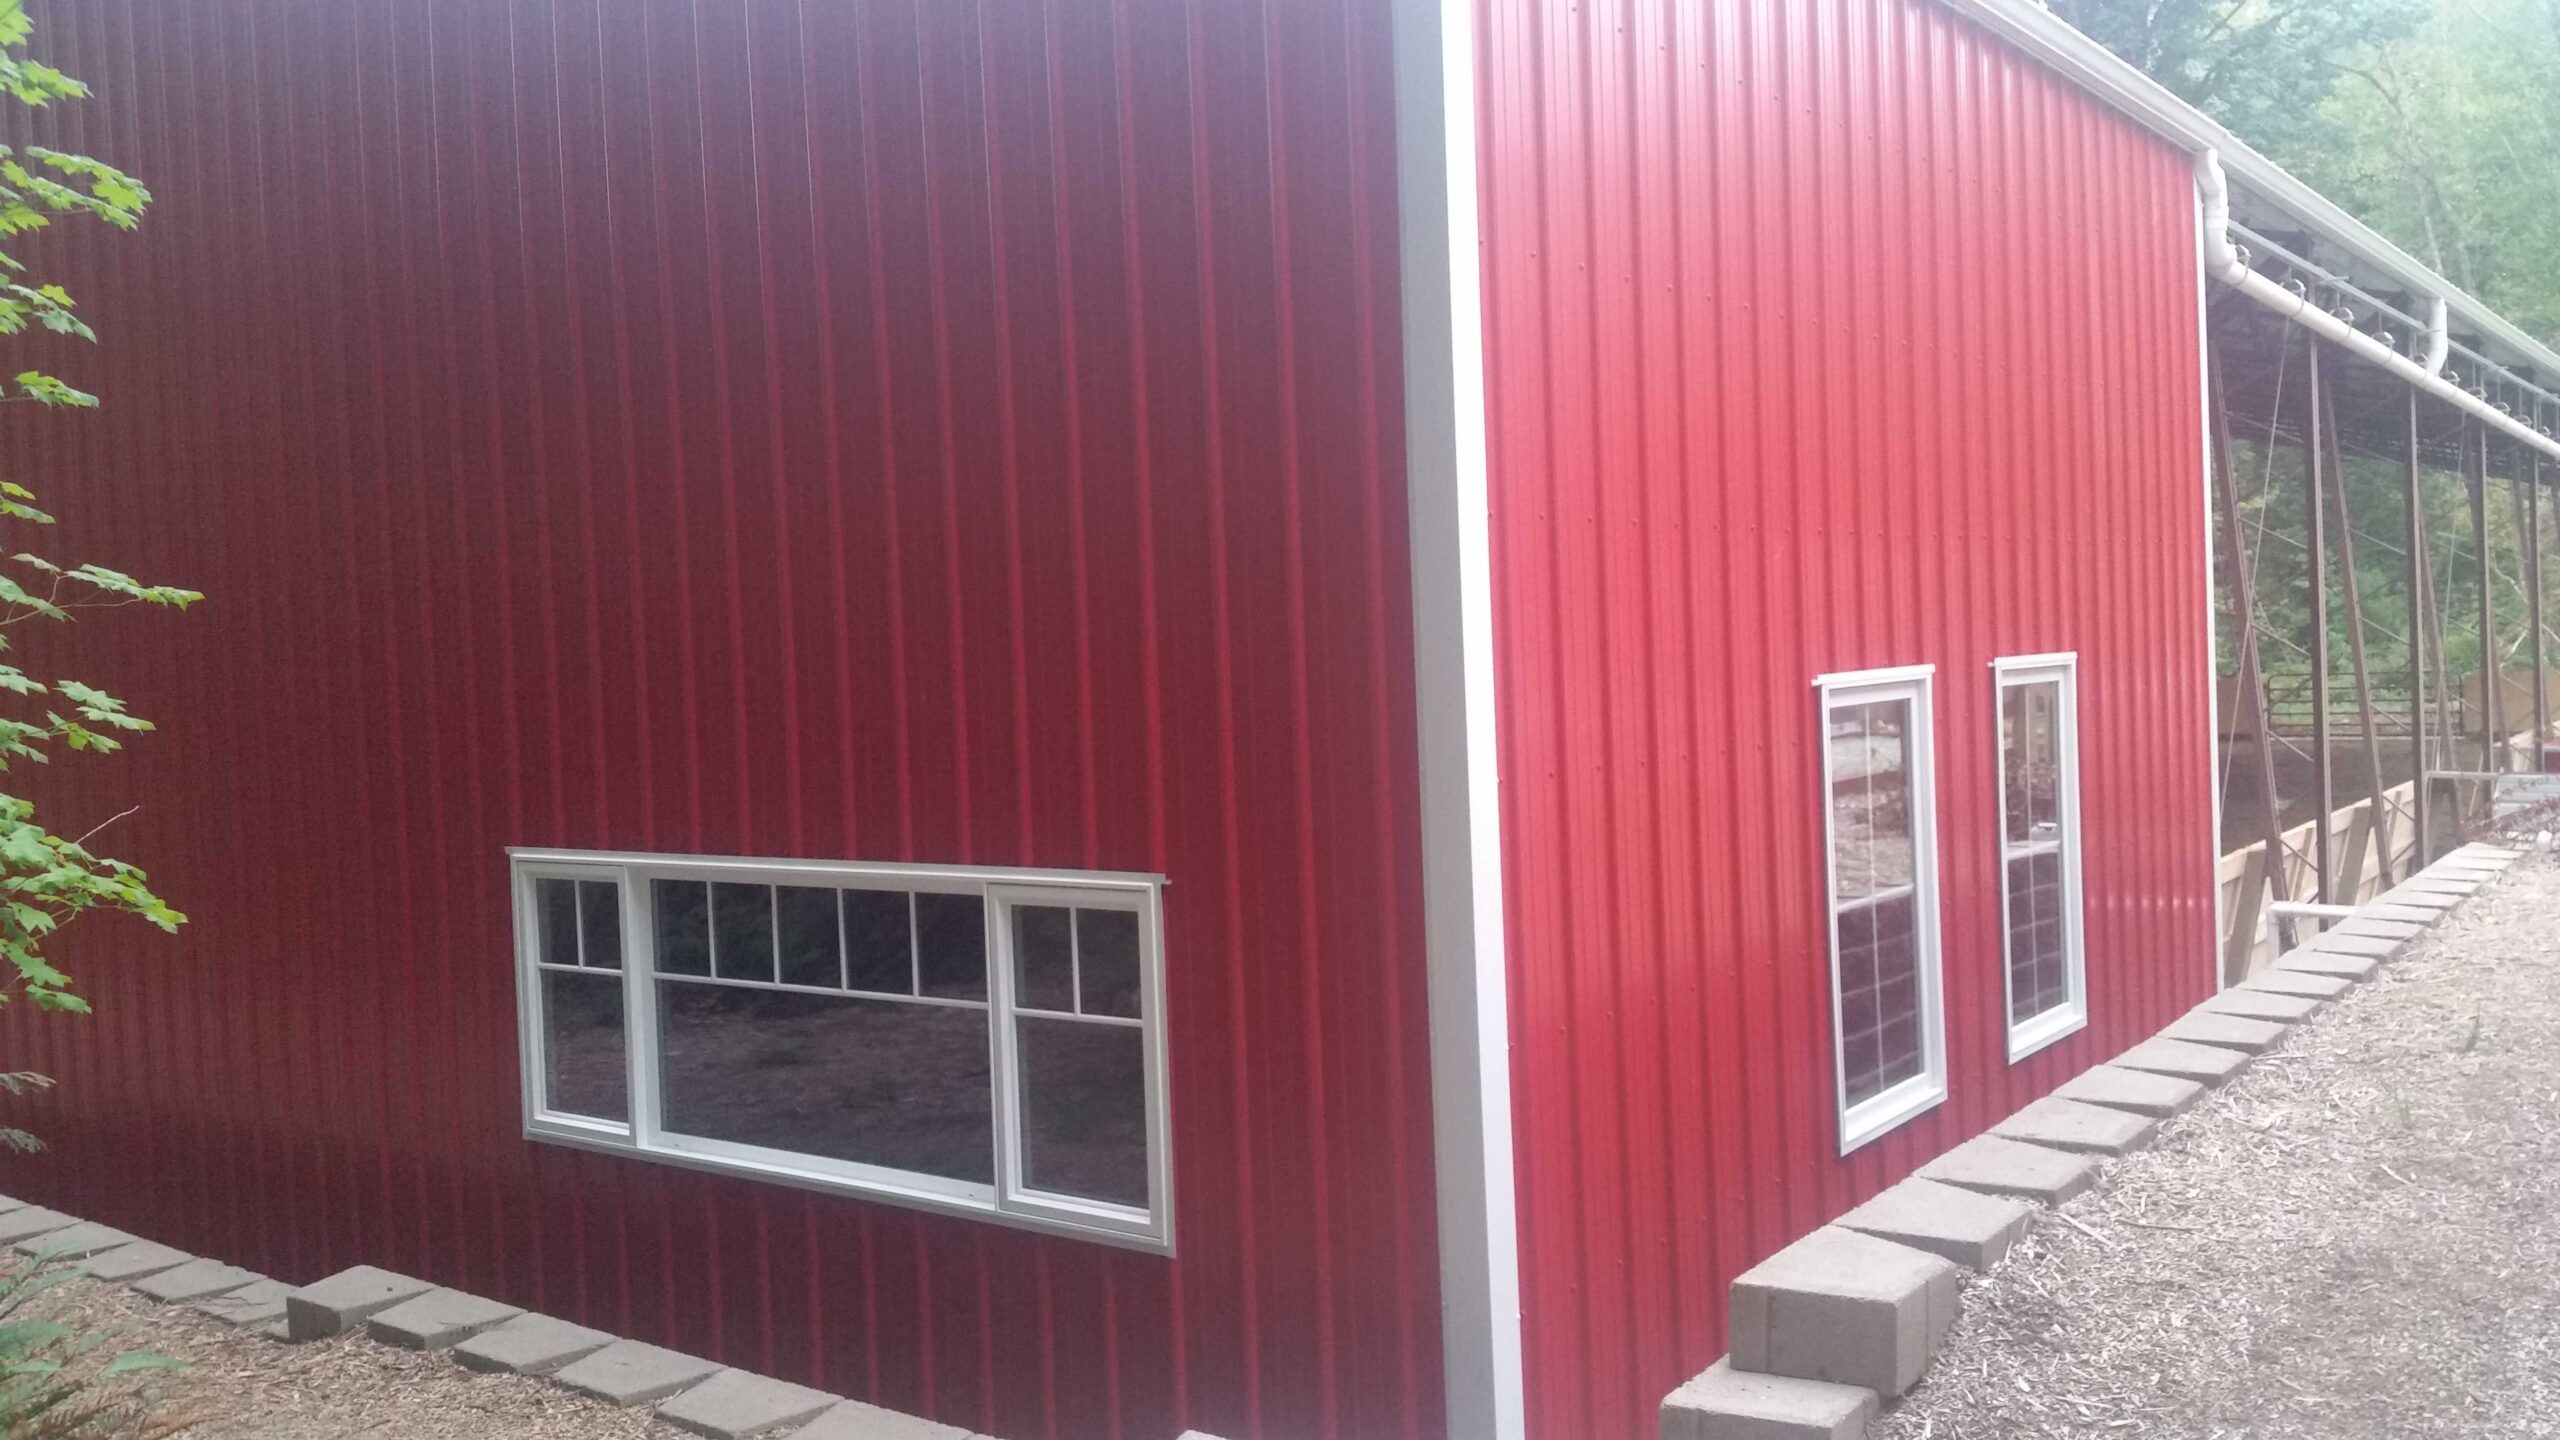
⇦ Dean then installed custom windows in the enclosed tack room space above the overhead doors.
Drainage Alternative
“Notice the way I had to support the u-channel for the drainage pipes. I bolded threaded rod through the column to support the channel. For anybody else that wants/needs to do something like this drainage option, having something else already attached to the trusses at the same height all the way across the building, would have saved a fair amount of time I spent buying threaded rod, cutting it, and bolting it on. Just food for thought. I know I am likely a very unique situation.” ~Dean
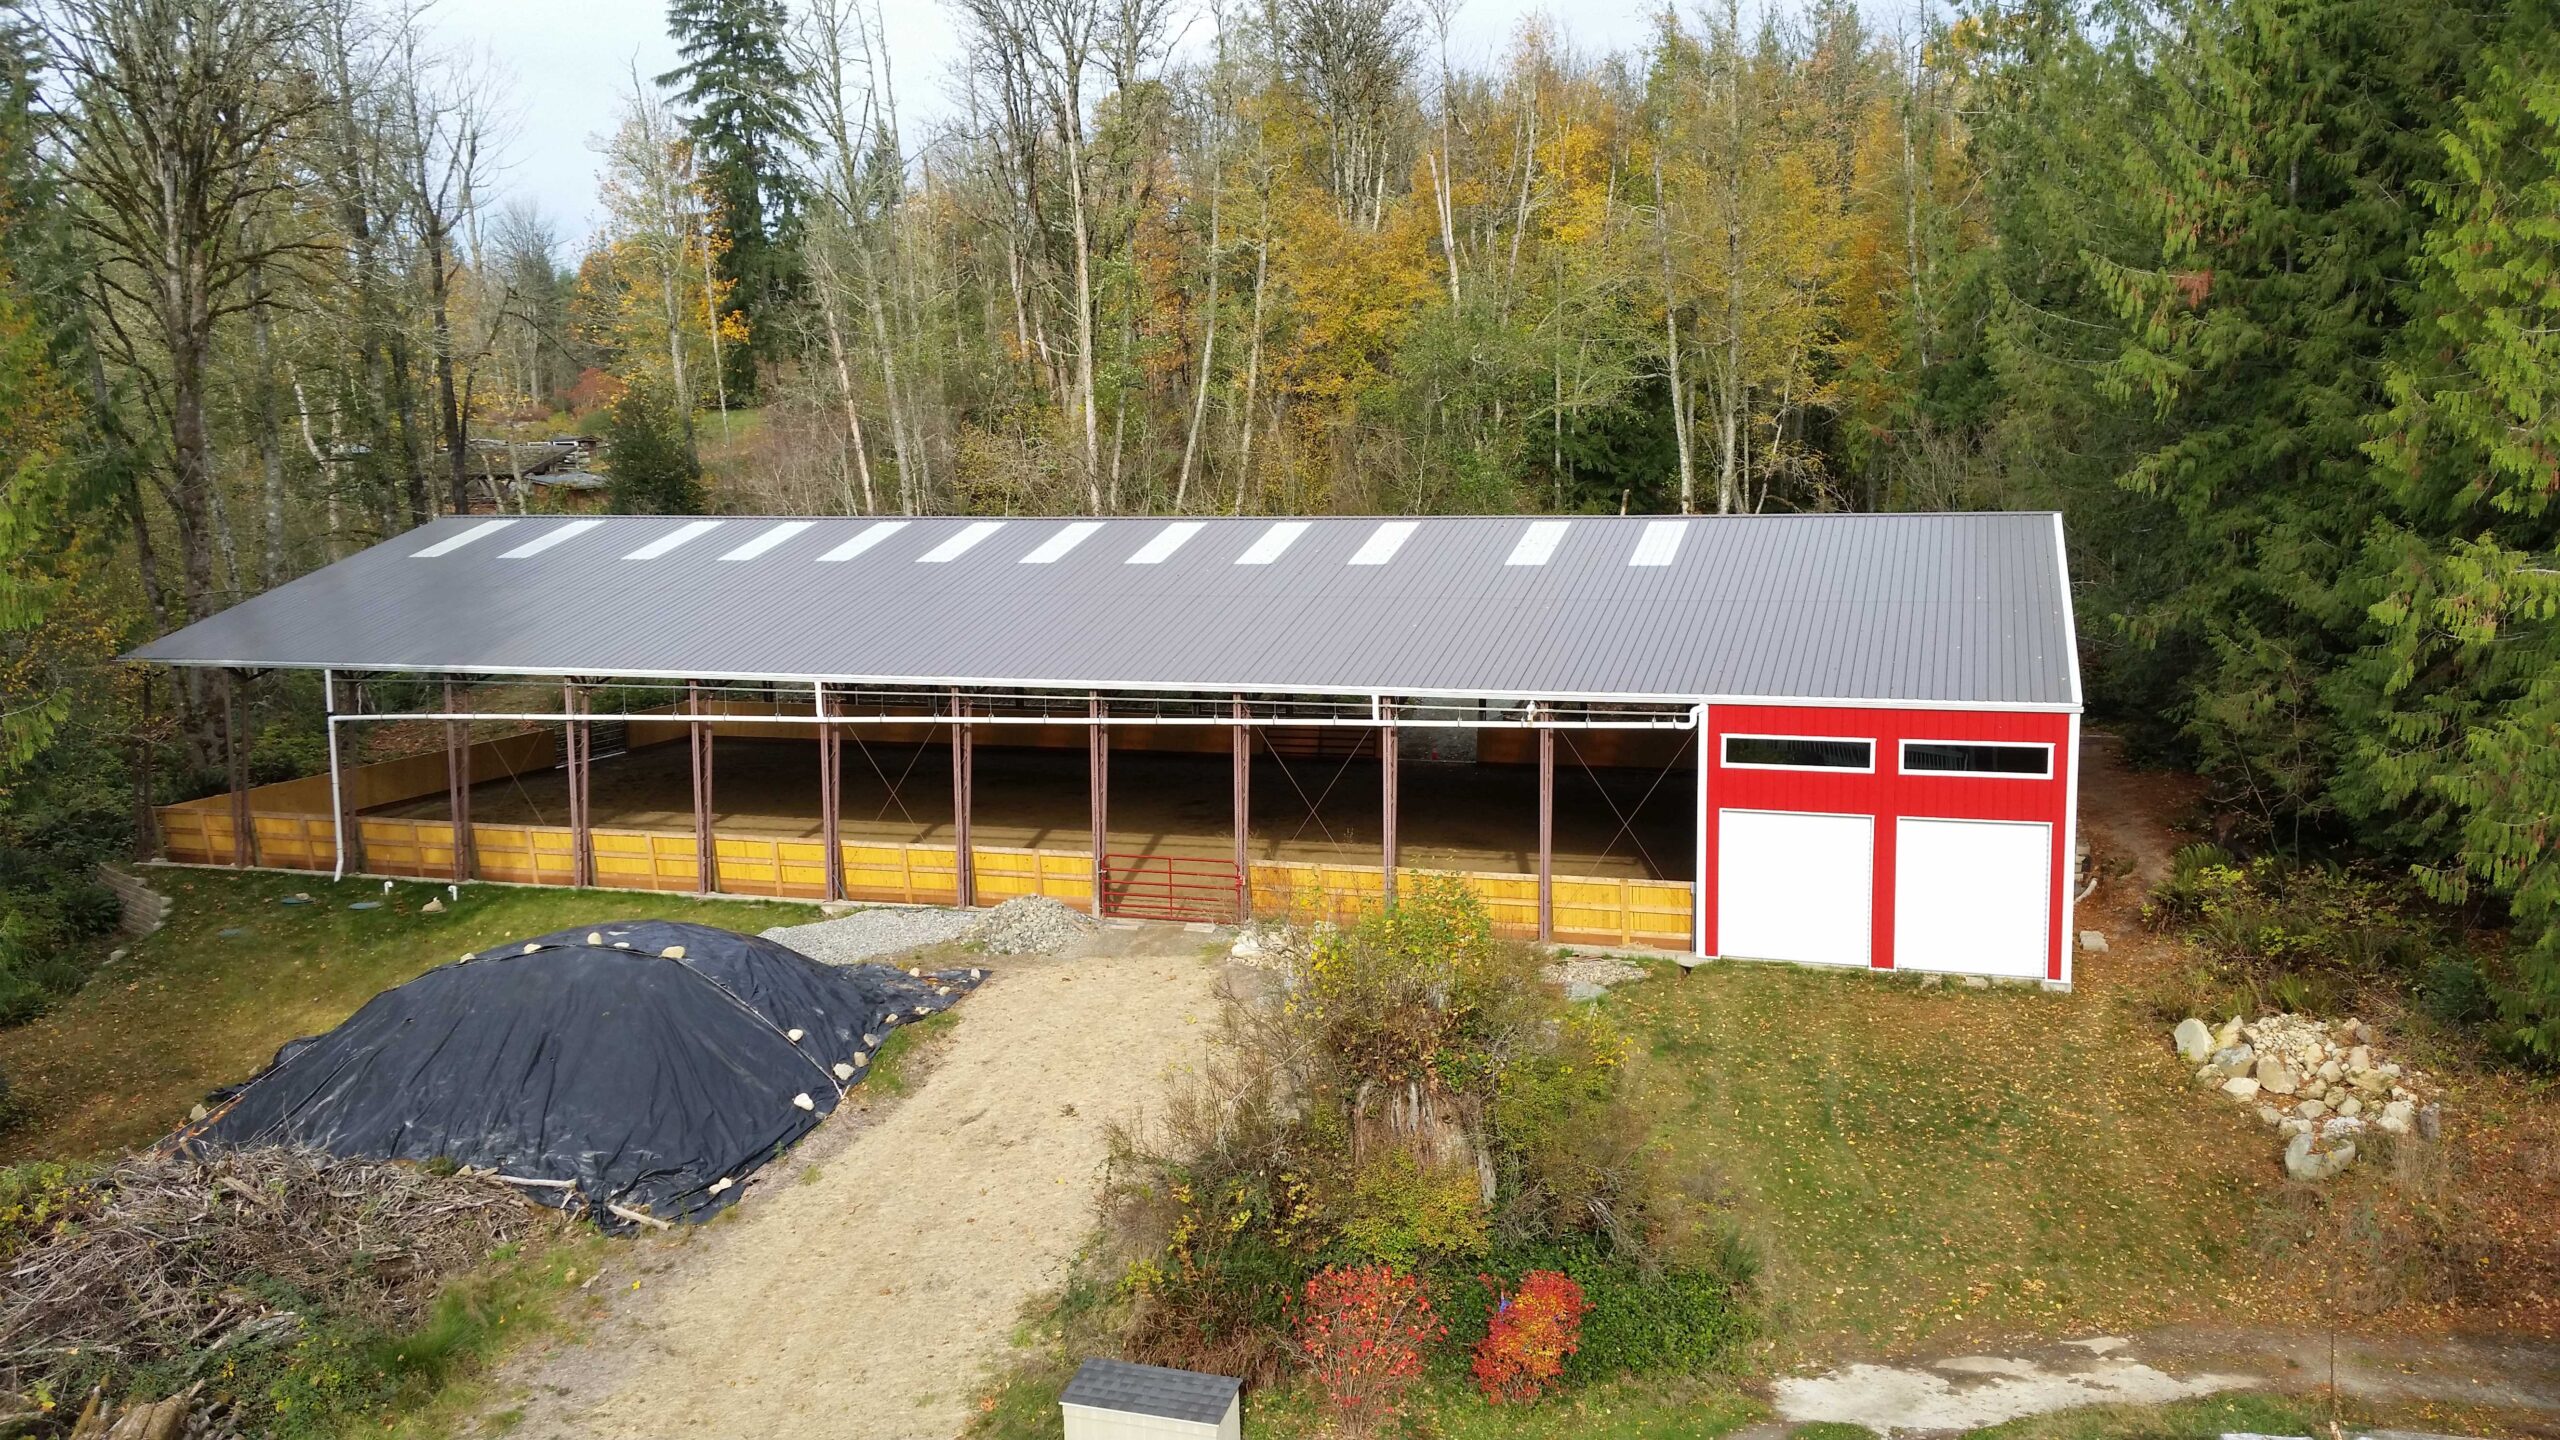
Side Walls and Trim
The final building installation components for Dean’s horse riding arena included hanging the sidewall panels, deluxe trim package around his overheads and the windows.
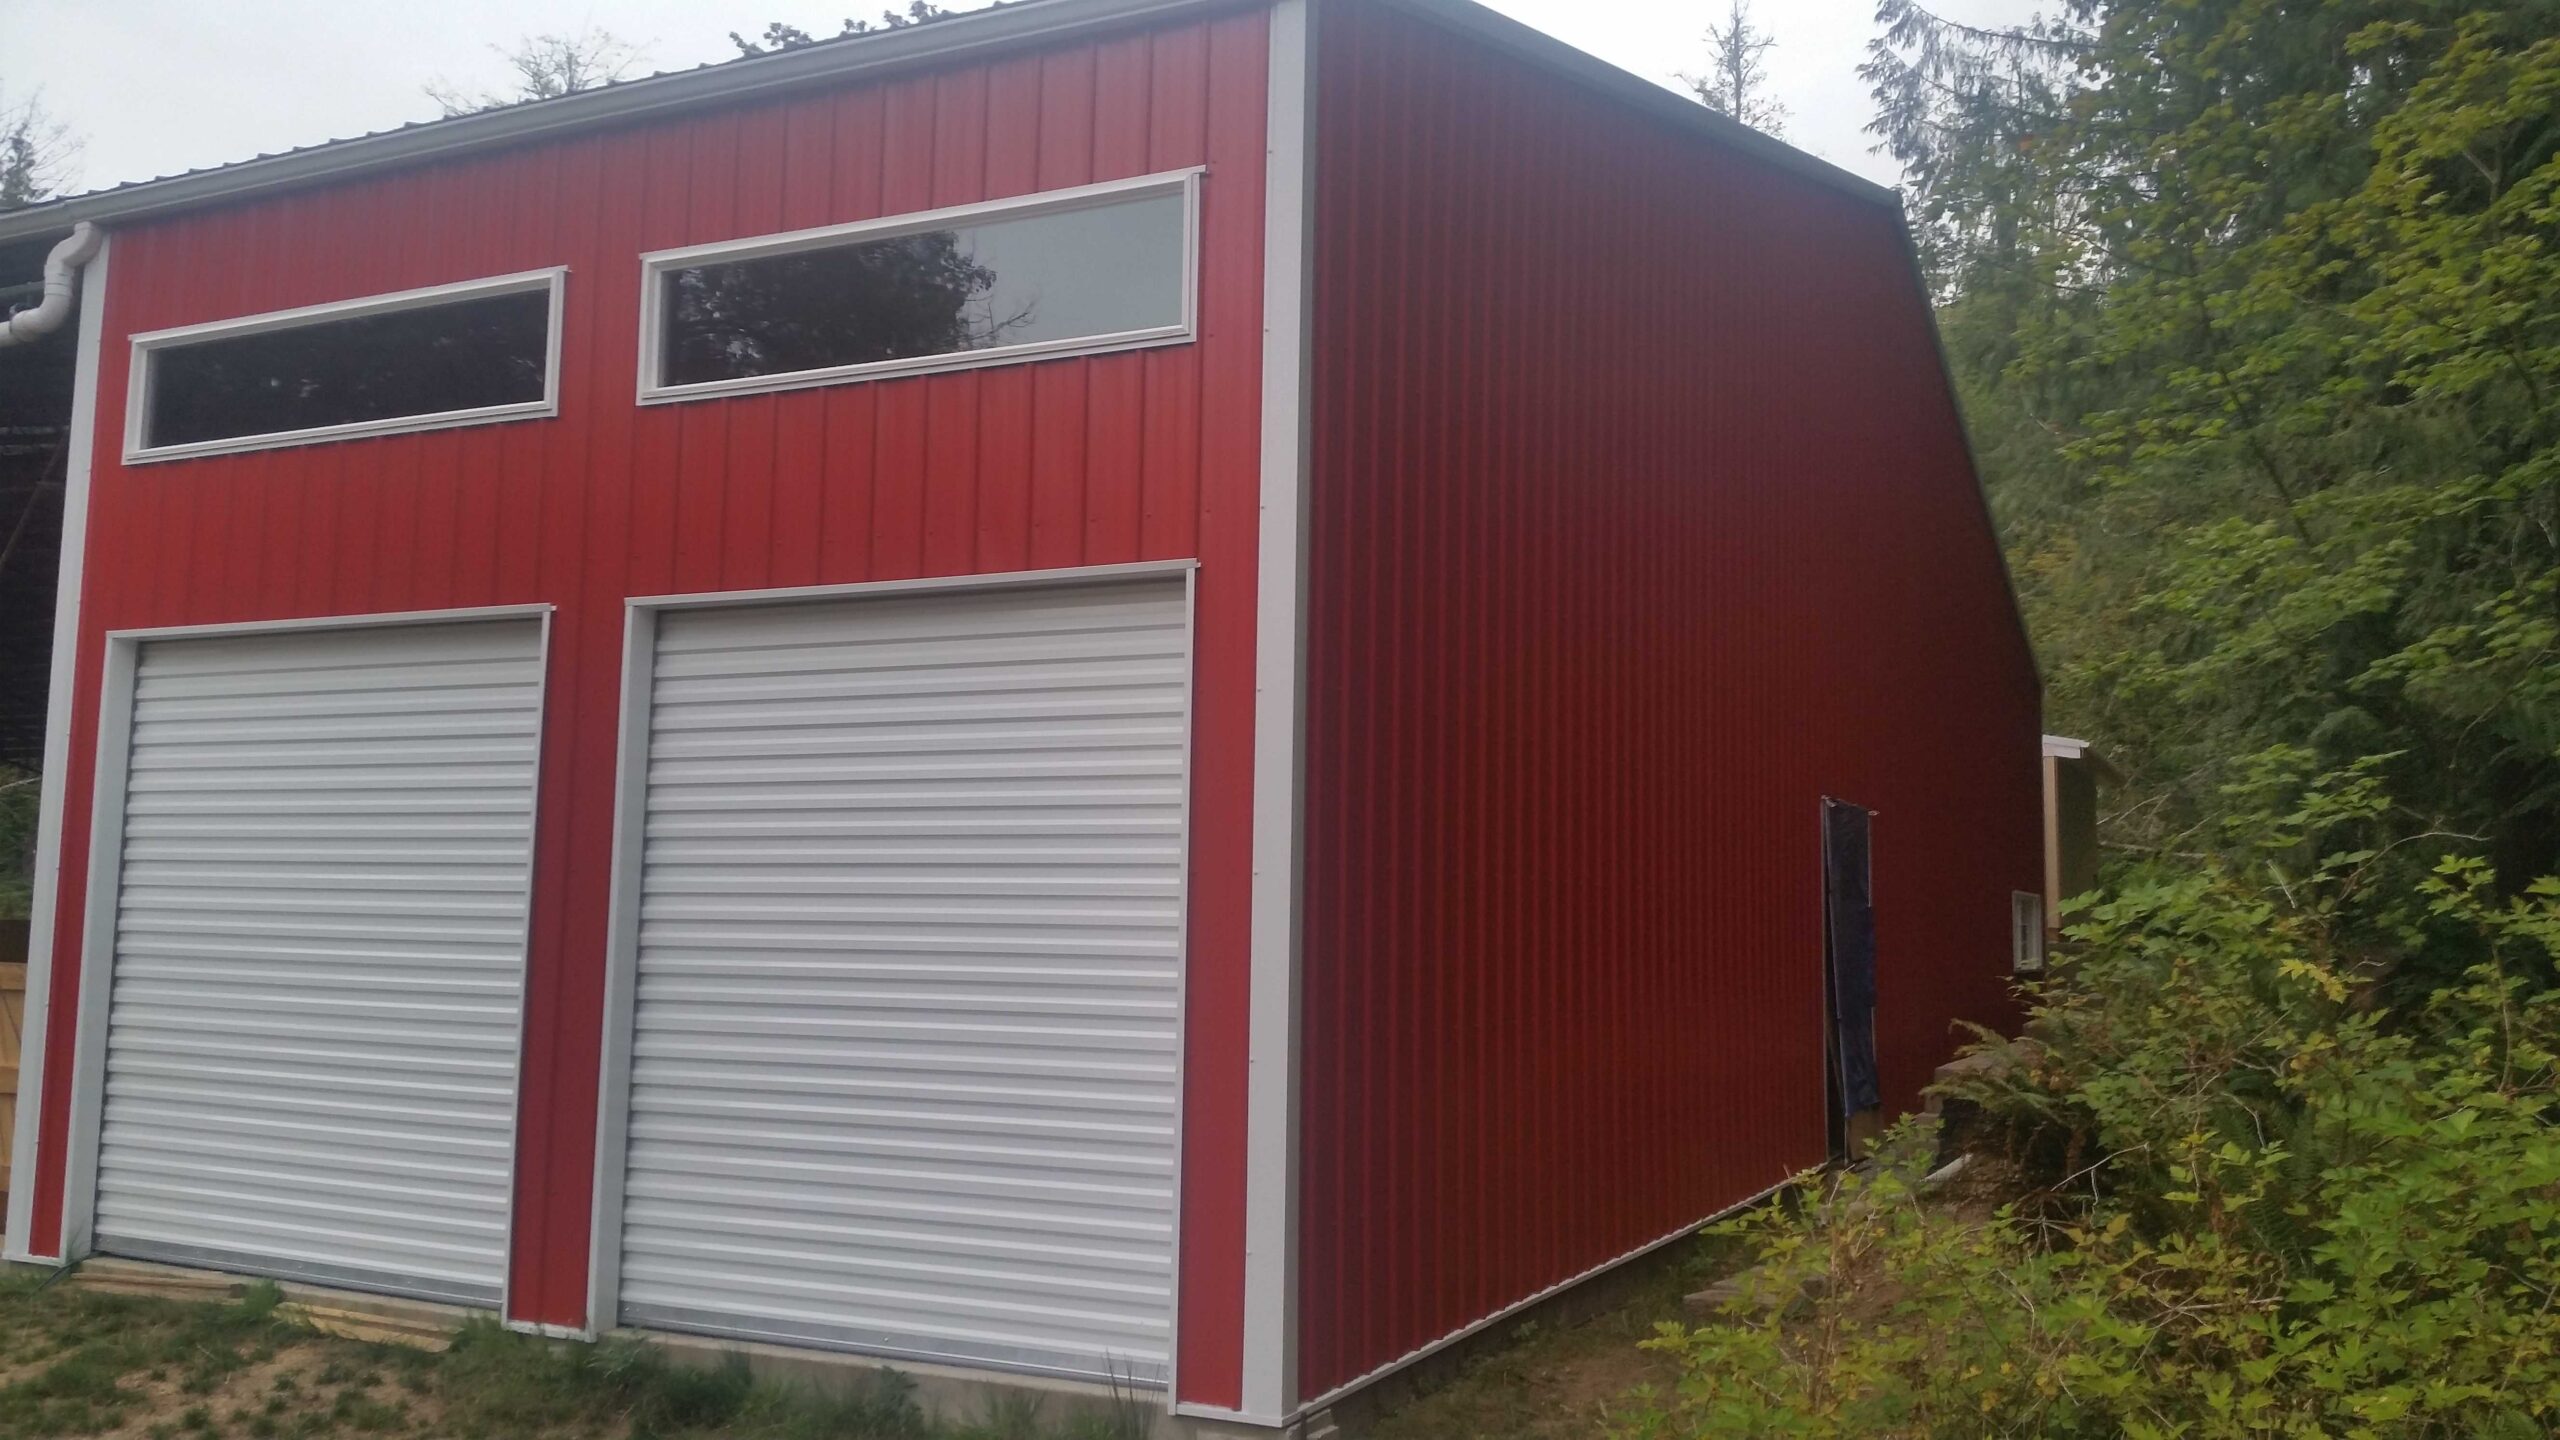
Finished Product
Dean’s new horse arena dimensions are 75’ wide x 140’ long with 16’ high sidewalls. He installed it all by himself using a telehandler and some basic equipment with some very innovative techniques!
Our building design experts are available to answer any questions you may have about your steel frame barn project.
Call us at # 800-825-0316
or visit us online at WorldwideSteelBuildings.com
for more information.